Tuesday, 19 January 2016

Colette Mabel Skirt & a repeat of the Style Arc Esme Top.


Colette Mabel skirt worn with Style Arc Ann T-Top. The denim jacket is RTW.

I have made the Mabel skirt from Colette Patterns several times before... see here and here, although I have not been completely happy with the fit until now. This is a great pattern for a simple knit skirt, but I have found it does need a little tweaking, depending on the fabric used. The stretch factor of different knits can vary so much.


This fabric was originally bought with the Style Arc Esme Designer Knit Top in mind. It is a gorgeous printed scuba knit that I purchased from Spotlight a while ago. It just screamed casual summer to me...specially when combined with white. I did make the Style Arc Esme Top and I managed to eke out the Mabel skirt from the left overs as well.


I made version 1, without the design seam lines on the front, and lengthened it considerably. I had planned to add the kick pleat at the back, but the amount of fabric I had left did not stretch quite that far. Instead, I created a split in the centre back, for walking ease. This seam was pressed open and then the seam allowances were top stitched down. I find scuba knit to be very springy and hard to get to lie flat, but this worked a treat. I used some left over white cotton lycra from the T Shirt to line the waistband.


Instead of just rushing ahead with this one, I decided to take my time and work on getting the fit more to my liking. I machine basted the side seams several times before I was happy with the shape. From memory, I pegged the skirt in a little from around the hip line down to the hem, to create a little more of a curve. My body is rectangular in shape, so benefits from any added curves. I also added elastic to the waistline, as I find it slips down without it. The hem was hand sewn.

Don't mind the snoozing dog.

Now onto the Style Arc Esme Designer Knit Top that was the original reason I bought this fabric.


 This is the second time I have made this top. The first one was made in a ponte knit which sewed up beautifully. This time I used this printed scuba knit. The scuba knit was not as well behaved as the ponte and I did have to unpick and redo a few bits, so overall it was a bit more fiddly to sew.


I kept the pattern pieces exactly the same as my first Esme, including the length alteration, as I was happy with the fit the first time around.


Again, I have paired it with white. This fabric combination just looks so fresh and summery to me. These denim pants are RTW purchased from Rockmans a few years ago. As my 23 year old daughter was taking these photos for me, she made the comment that "Mother's look good in white pants". I questioned why she thought that and her reply was that "she could never keep white pants clean". I thought that was quite amusing...as if mothers have some super power to keep their white pants clean...I actually find it a struggle.


The collar was cut on the bias and sits beautifully in the scuba knit, just as it did in the ponte. Don't try and skimp on fabric to cut this on the straight grain. I don't think it would sit nearly as nicely as it does on the bias.


I had a bit of trouble getting the collar points to look as good as the ones in the ponte, but they are not too bad. I had picked this side to be the one I wanted to show as it looked the best, but I somehow got confused and sewed it on inside out. Glad I persevered and unpicked it, and resewed it on the right way. 


Both these garments were sewn during my Christmas/New Year break from work. In fact, I could have called it a Sewcation. I don't think I will ever wear this top and skirt together though...far too matchy matchy. What do you think?

Happy Sewing

Friday, 15 January 2016

A Style Arc Ginger Knit Top for Jungle January

There's nothing like an animal print and a loose fitting top to camouflage those extra few pounds that have crept on over the festive season.


I managed to whip this top up over a couple of evenings during my first week back at work, and wore it to work on Friday with my Style Arc Barb Pants. I have made this top once before here, so it seemed easier the second time around.

Style Arc Ginger Knit Top

This top is really quite a simple, yet stylish design. The front shoulder pleats and the cross over wrap create a flattering fit, and the top works well with pants and would look great with a slim fitting skirt too.


The fabric is a gorgeous jersey purchased from Style Arc a while ago. It is very good quality with a lovely drape...perfect for this pattern.


There are only three pattern pieces: front, back and back neck binding. The back is the full pattern piece so it can be cut out in a single layer. You are supposed to cut one pair of the front piece, but I found this pattern piece was too wide to cut on a double layer (fabric folded in half), so I had to cut it out on a single layer too, carefully remembering to flip the pattern piece over so that I was cutting a pair, and not two identical pieces.


The wrong side of the fabric does peek out a little at the front hemline when standing a certain way. This was a huge issue with my first version and I had to remove a large wedge of fabric from the under layer to stop this occurring. I made this version exactly as per the instructions and have not had a problem, so I don't know what I did wrong with the first one.


The print was quite a large design and I was concerned with positioning the pattern evenly over the top. I didn't have a lot of fabric to play with so I spent quite a bit of time playing around with the positioning of the pattern pieces before cutting out.


I am really pleased with how this turned out and I am glad I spent that extra time at the beginning of the project. It would have looked terrible if the same large pattern motifs had been placed side by side.


The hems were all sewn with a very narrow zig zag stitch because I was being lazy and couldn't be bothered setting up the twin needle. They all look fine and have enough stretch to prevent the thread from breaking.


This is actually my second Jungle January item sewn this month. The first is yet to be photographed...hopefully this weekend. It features a zebra print. Have you sewn something up for Jungle January yet?

Happy Sewing

Tuesday, 12 January 2016

A Rainbow Style Arc Twiggy Dress


Continuing my love affair with Style Arc patterns, I have tried the Twiggy Dress and I have not been disappointed. Hot off the sewing machine, I wore this to work yesterday, my first day back after the Christmas/New Year break. This was a lovely bright dress to cheer me up as my holiday came to an end.

Style Arc Twiggy Dress

The pattern had  a few details that I thought were unnecessary and only made the construction of the dress a little more complicated, with out really adding anything to the look. I eliminated the side zip and the button closure on the back yoke. The back yoke was cut as one piece like the front yoke and the neck opening is plenty wide enough for the dress to slip on and off quite easily.


The print caught my eye as soon as I laid eyes on it at Spotlight in Queanbeyan. It is a scuba knit and the black contrast is a ponte knit purchased from Knitwit.


I cut a size 12 which is my usual Style Arc size. I found the fit to be a little loose and I ended up running the side seams in a little to get a better fit. Next time I will take in the princess seams at the back for a little more shaping there too. The seam allowances were all top stitched down to get them to lay nice and flat. The scuba knit is quite springy and doesn't hold a press very well.


The neckline and sleeves are finished off with separate two piece, interfaced, shaped bands. Constructing the bands was probably the most fiddly and time consuming part of making the whole dress. However, they sit very well and add a nice quality finish to the dress.


The photo above shows the bands a little clearer. It is quite difficult to photograph details in black. I turned the hem up 3cm and stitched down with a twin needle as I thought this finish looked good with all the other top stitching on the dress. My mind has been racing with more colour blocking ideas for this dress, so expect to see another one in the not too distant future.


I got a few lovely compliments on my rainbow dress from my work colleagues and also one from a complete stranger I passed in the carpark at the shops. There is nothing better than that feeling, when you get to say "and I made it myself".

Wishing everyone a successful and joyful sewing year ahead.

Jean

Monday, 28 December 2015

Style Arc Esme Designer Knit Top


The Esme Designer Knit Top appealed to me the minute it was released. The relaxed fit and stylish design lines ticked all the boxes. I have been making the most of the Christmas Holidays by spending time in my sewing room over the last couple of days, much to my daughter's disgust. She just doesn't get the fact that I love to sew.


Style Arc suggest using ponte or scuba knit to make up this top. I have a lovely printed scuba knit ear marked for this pattern, but I decided to use this less precious rich purple delux ponte from Spotlight, to make a test garment.


I made one alteration to the pattern before I started, and that was to add 5cm to the length of the front and back pattern pieces. I added the length in just above the top of the side split. I am long in the body and I knew that I would not find the length flattering on my body, as drafted.


I am happy with the length after my alterations and the fit is ok as drafted. I made a size 12. I love how beautifully the collar sits at the neckline. I was a little dubious about cutting the collar on the bias in a knit, but this has created a lovely result so I am now sold on the idea. The collar only worked folded over. I couldn't make it stand nicely as illustrated on the pattern envelope.


The instructions suggest sewing the seams, pressing them open and then top stitching them down as a feature. I went with this suggestion and am very pleased with the beautiful neat finish this created. All raw edges were overlocked to create a neat edge, before the seams were sewn on the sewing machine.


The front and back hems, side slits, side seams and armhole edges, were top stitched with one continuous line. I did press and pin quite extensively before beginning the top stitching, but I am very pleased with how neat this turned out.


The back collar points turned out beautifully and this was quite easy to achieve. The instructions were clear and also provided diagrams for this step. This ponte was very well behaved and all the corners and points turned out so well. Not something I always have great success with.


The skirt was also made to wear with this top. I used the Colette Mabel Skirt pattern, combining the style of version 1 with the length and kick pleat of version 3. I have made the Mabel skirt twice before and am still working on the fit. This one is made from a scuba knit from Spotlight. I used the purple ponte to line the waistband. I have also inserted elastic into the waistband to make it feel more secure. 


The kick pleat is constructed in the usual way, as opposed to the Colette way of sewing it closed. I think it sits better open. There was enough delux purple ponte left over to make another Colette Mabel skirt, which can also be worn with the top to create a different look.


Now on to the next project...


Happy sewing

Saturday, 19 December 2015

Style Arc Misty Stretch Pull-On Jean

Summer is here and I have found my wardrobe lacking in the casual pants department. I recently purchased the Style Arc Misty Stretch Pull-On Jean pattern and I had a 1 metre piece of stretch bengaline (also purchased from Style Arc several months ago with plans to make a skirt), marinating in the stash. I realised that this would be enough fabric to make a shortened version of the pants...perfect for the warmer weather.


This pattern appealed to me because of the "jean like" features included: front mock pockets, coin pocket, mock fly, back yoke and back pockets. Yet the comfort factor was retained with the elastic waist, and the ease of wear with the "pull on " style.

Style Arc Misty Stretch Pull-On Jean
I enjoyed sewing these pants in short bursts whenever I got a spare moment during the week. There are lots of little steps that fitted in well with short time sewing opportunities.


The fabric is a good quality stretch bengaline in a denim look colour, however it is much more light weight than stretch denim. It is quite stretchy and has excellent recovery. I made my usual Style Arc size 12 and these were cut and sewed with no fitting alterations.


The only alterations I made was to remove 30 cm from the hem line to create the 3/4 length. I also changed the method for attaching the elastic waistline. I had read that the exposed double layer of elastic was not so comfortable against the skin (and I couldn't buy any 3cm wide elastic), so I used the Style Arc Barb Pant waistband, which encases the elastic inside a waistband. This has worked very well and the pants are very comfortable.


I was very disappointed when I saw these photos of the back of the pants. I didn't realise there was so much wrinkling at the back. I have been trying to find out how to fix this issue but there doesn't seem to be any clear cut solutions. I think I need to add width to the back leg but I'm not entirely sure about how to do this. Should I add it to the in-seam, or the side seam, or both. Or should I cut and spread the pattern piece, adding width at the centre of the pattern piece? I welcome any suggestions or advice please.


I am happy with the pocket details. All the top stitching was done with a twin needle, as instructed. I just used a normal Gutermann poly thread in a pale grey and I am pleased with the result.


I was pretty pleased with my seam matching at the yoke considering I sewed this seam on the overlocker. Don't you love it when things work out well, when you are not really expecting them to.


Unfortunately, all the top stitching details will mostly be hidden because I will always wear these pants with a longer style top. Looking forward to your words of wisdom regarding my wrinkling issue so I can apply them to my next pair.


Happy Sewing

Sunday, 13 December 2015

Style Arc Kate Dress... with some changes

I knew it wouldn't be long before I sewed the Style Arc Kate Dress again. My first version has become a firm favourite in my wardrobe and been worn at least once a week since completion.


My second version was made specifically to wear to my work Christmas Party which was being held at a fancy restaurant on the river front. I chose to stay with the 3/4 length sleeves as I knew we would be dining alfresco and it could be a little chilly on the water. There were a few changes made to the pattern for this version: I lowered the waist by 3cm and retained the extra length at the hemline. I also did away with the gathered front piece and just cut one pair from the left hand front.


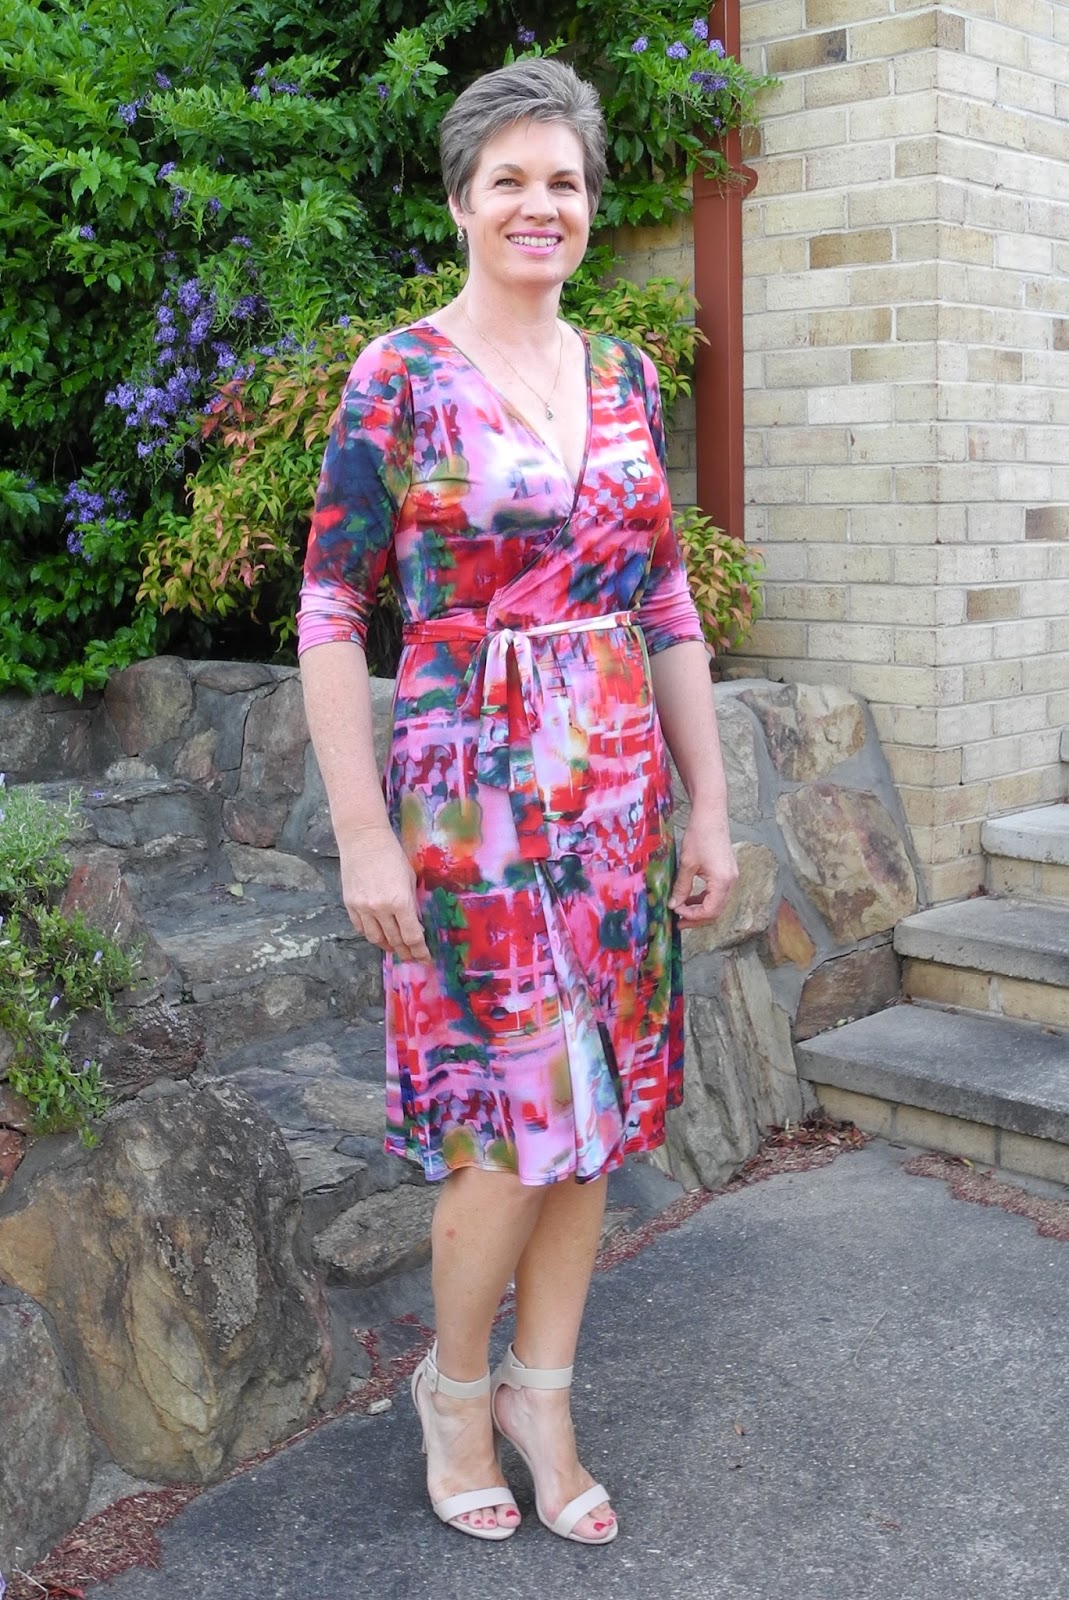
This fabric was another poly/spandex knit purchased from Spotlight. It was quite lightweight and gave me a lot of grief during the sewing process. There was a lot of Bondaweb iron on adhesive used on all the hems to give  enough body for my twin needle stitching to lay flat. The print had some large darker areas and some large lighter areas and this proved a bit of a challenge to get the dark and light areas distributed evenly over the dress. I ended up with too much of the lighter area on the front, so I switched the overlap...problem fixed. You may have noticed that this version ties on the opposite side.


The neckline was lowered by 4cm at the back between the shoulder seams and then tapered to nothing at the waistline on the front. This gave the dress a more "party like" vibe as opposed to a "modest and work appropriate" vibe that the original pattern gives.


Self fabric binding was used to finish off the neckline. This time I didn't turn the binding to the inside. It gave a less bulky finish to leave the binding exposed and secure the seam allowance down with a twin needle. This gave a nice secure neckline with no gaping issues at all.


Very happy with my new party dress and I can report that I felt appropriately dressed, comfortable and feminine at my Christmas Work Party last night. I can assure you that I have not finished with this pattern yet. I have some short sleeved, work appropriate versions in the pipeline so stay tuned.

On a sad note, my Bernina 350PE died a very sudden and unexpected death, just as I was finishing this dress. There was a loud POP! and then ...nothing, no lights, no screen, no life.
It has been packed up and sent back to Bernina for repairs, hopefully covered under warranty. In the meantime, I have dug out my faithful old Bernina 1005 and dusted it off. Despite being totally neglected since the arrival of my new Bernina almost three years ago, it still sews like a dream. So the sewing will continue!


Happy Sewing