Showing posts with label Pants. Show all posts

Sunday, 4 September 2016

Style Arc Esme and Elle

Style Arc continue to be my go - to pattern company. I find most of their designs suit my lifestyle and taste. The Esme Designer Knit Top and the Elle Pants are patterns I have made numerous times and are firm favourites.


This is the first time I have made the Esme with sleeves. The only pattern alteration I made was to lengthen the body by 5cm, the same as my previous versions, see blog post here and here. This length is much more flattering on my figure.


I like the bottom coverage at the back. The fabric is a deluxe ponte from Spotlight in a lovely fushia pink. I am continually tweaking the Elle pants pattern trying to achieve that elusive perfect fit. I still seem to have far too many wrinkles, but maybe this is the nature of slim pants? Fabric used was denim blue stretch bengaline from Style Arc. They have the best bengaline...great quality.


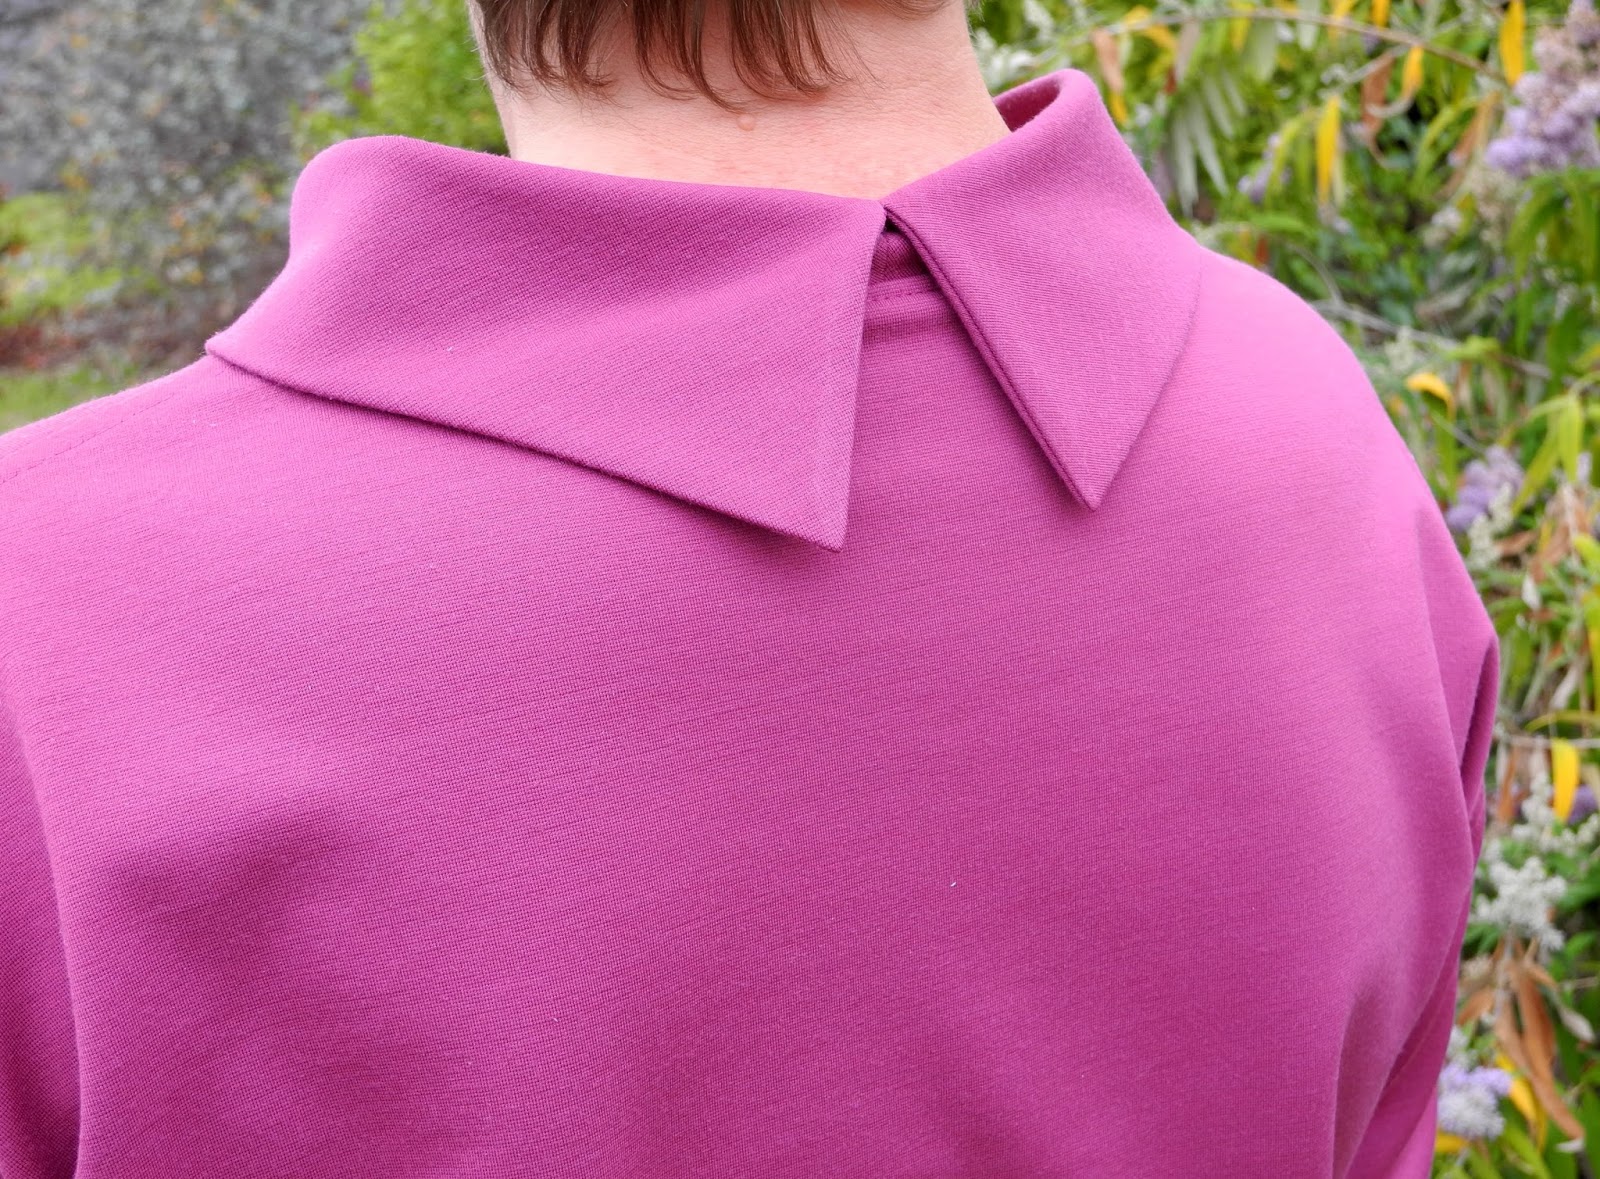
As instructed, I pressed the seams open and top stitched them down. I like the subtle interest this gives the top. The collar is my favourite feature and it turns out so beautifully, especially when cut on the bias.


This pattern is drafted very well, and everything turns out so neat. I must say I prefer the sleeveless version. I think it works better. The addition of the sleeves creates extra fabric folds at the underarm/bust area which just don't look quite right. Despite this, I have worn this top many times since completion back in May (you may have seen a sneak peak during Me Made May) and it works equally well with long pants or a slim skirt.


The top stitching down the side seams continues down the side split and across the deep hem and back up the other side.


Even though I love the collar on this top, I would like to make the collar less version so I can accessorise with a scarf or long beads. The collar limits how you can accessorise.

Two garments that have already seen a lot of wear in my wardrobe already.

Happy Sewing

Saturday, 30 April 2016

Deer and Doe Plantain Tee and Style Arc Wallis Pants

Why have I waited so long to try this wonderful pattern?


The Plantain T-Shirt is a free downloadable pattern from Deer and Doe, that has been around for quite a while, yet I have waited until now to give it a try. I was after a top to wear out to a work dinner, that would be suitable to wear with my black Style Arc Wallis Pants. It needed to be evening appropriate and a quick sew as my time was limited. The Plantain T-Shirt was the perfect candidate.

Deer and Doe Plantain T-Shirt

I had this black and silver sparkly knit in my stash which had been bought ages ago from Spotlight for a completely different project that never eventuated. This fabric also met the criteria for this top.


I cut a size 44 and added 8cm to the length to make it more tunic length. In hindsight I should have added a little more to the length as I could only turn up a 1cm hem without making it too short. I love the shape of the neckline on this top, and the general shape of the T-Shirt is quite flattering...being fitted in the shoulders and across the bust, yet skimming loosely over the tummy and hips.


Although I am very happy with the fit of the front, the back needs a little more room to skim over my backside without getting caught up. This will be easily fixed for the next one.


There are generous 5/8th" seam allowances thank heavens, as I could see that this top was going to be too tight on me when I tried it on Vera during construction. The fabric has only a small amount of stretch and I should have allowed for this by cutting a larger size. I was able to save it by sewing 3/8th" seam allowances at the side seams.


The Style Arc Wallis Pants were sewn last year, but I never got around to blogging them. They are made from a lovely black ponte purchased from Style Arc. It has an excellent recovery so they don't bag out at all.

Style Arc Wallis Pants
I cut a size 12 and added a large calf adjustment to cater for my extended calves. The line drawing is incorrect. The curved side seam begins at the usual position for a side seam and curves toward the front at around hip level. It does not start from the back as the line drawing suggests. I am quite happy with the fit of these pants and they have been a really useful wardrobe staple.


Stay tuned for more Plantain Tees.

Happy Sewing

Saturday, 19 December 2015

Style Arc Misty Stretch Pull-On Jean

Summer is here and I have found my wardrobe lacking in the casual pants department. I recently purchased the Style Arc Misty Stretch Pull-On Jean pattern and I had a 1 metre piece of stretch bengaline (also purchased from Style Arc several months ago with plans to make a skirt), marinating in the stash. I realised that this would be enough fabric to make a shortened version of the pants...perfect for the warmer weather.


This pattern appealed to me because of the "jean like" features included: front mock pockets, coin pocket, mock fly, back yoke and back pockets. Yet the comfort factor was retained with the elastic waist, and the ease of wear with the "pull on " style.

Style Arc Misty Stretch Pull-On Jean
I enjoyed sewing these pants in short bursts whenever I got a spare moment during the week. There are lots of little steps that fitted in well with short time sewing opportunities.


The fabric is a good quality stretch bengaline in a denim look colour, however it is much more light weight than stretch denim. It is quite stretchy and has excellent recovery. I made my usual Style Arc size 12 and these were cut and sewed with no fitting alterations.


The only alterations I made was to remove 30 cm from the hem line to create the 3/4 length. I also changed the method for attaching the elastic waistline. I had read that the exposed double layer of elastic was not so comfortable against the skin (and I couldn't buy any 3cm wide elastic), so I used the Style Arc Barb Pant waistband, which encases the elastic inside a waistband. This has worked very well and the pants are very comfortable.


I was very disappointed when I saw these photos of the back of the pants. I didn't realise there was so much wrinkling at the back. I have been trying to find out how to fix this issue but there doesn't seem to be any clear cut solutions. I think I need to add width to the back leg but I'm not entirely sure about how to do this. Should I add it to the in-seam, or the side seam, or both. Or should I cut and spread the pattern piece, adding width at the centre of the pattern piece? I welcome any suggestions or advice please.


I am happy with the pocket details. All the top stitching was done with a twin needle, as instructed. I just used a normal Gutermann poly thread in a pale grey and I am pleased with the result.


I was pretty pleased with my seam matching at the yoke considering I sewed this seam on the overlocker. Don't you love it when things work out well, when you are not really expecting them to.


Unfortunately, all the top stitching details will mostly be hidden because I will always wear these pants with a longer style top. Looking forward to your words of wisdom regarding my wrinkling issue so I can apply them to my next pair.


Happy Sewing

Friday, 23 October 2015

Style Arc Barb's Stretch Pants and another Coco

The Style Arc Barb's Stretch Pants have been the most worn garment in my wardrobe over the last twelve months. I'm really not sure why I have never blogged about them until now, although they have made several sneak appearances in previous posts.

Style Arc Barb's Stretch Pants with boot cut alteration.

The size 12 fitted well straight out of the envelope, without any fit alterations. You may notice that I have added some flare, beginning around knee level and increasing down to the hemline. I prefer the boot cut style over the straight style. Here is a photo taken last year of my first pair of Barb's, made without any alterations.

Style Arc Barb's Stretch Pants without any alterations.
I didn't like the way they seemed to get caught up on my shoes and not sit properly. 

I have made two pairs with the boot cut alteration, one in black and one in navy and these have been on high rotation in my work wardrobe. The fabric is Style Arc's bengaline and has held up extremely well with all the washing and wearing they have been subject to.


The waist band sits quite high on the waist, (much higher than Style Arc's Elle Pants), and I find them very comfortable. The waist band sits very flat and is quite unobtrusive under tops. Please excuse the wrinkles in the photos as these had been worn to work all day. I'm very happy with the fit, considering these are made without any fit alterations.


The fit in the back is quite good too, without too much wrinkling going on. Sorry, this is not my best angle.

Tilly and the Buttons Coco Tunic with Sewaholic Renfrew Cowl
Now, onto the Tilly and the Buttons Coco Tunic. I think I have lost count of how many times I have used this pattern. Definitely money well spent. For this version I borrowed the cowl from the Sewaholic Renfrew. The fabric was a lovely soft drapey knit of unknown composition which worked very well for this top. The cowl is so lovely and cosy.


This combination has been a favourite lately for work. It's just so easy to wear and so comfortable.


Happy Sewing

Thursday, 8 October 2015

Style Arc Elle Pants and a Couple of Coco Tunics

Way back in May I made another pair of Style Arc Elle Pants. I have been working on the fit, and in addition to raising the waistline and a large calf adjustment tried previously here, I have added a Flat Seat Adjustment. I was trying to reduce the amount of wrinkles at the back, upper thigh area. Here is the photo I posted during Me Made May 15.


I am wearing them here with another Tilly and the Buttons Coco Tunic. This one is without pockets and has the retro funnel neck collar. I love this tunic but I do find it difficult to style. The collar gets in the way of a scarf and necklaces just don't sit right at all.


The fabric is chocolate brown stretch bengaline purchased online from Style Arc, and is good quality. These pants have been worn all day at work and are now quite wrinkled unfortunately for the photos. The fit at the front is quite good. 


I think the flat seat adjustment did improve the fit at the back, compared to my previous Elle's, but there is still room for improvement. I suppose some wrinkles are necessary or you wouldn't be able to sit down.

I had some more of the cream ponte in the stash so I made another Coco Tunic, this time with the scoop neckline borrowed from the Sewaholic Renfrew.


This one has been much easier to style with scarves and necklaces. My daughter gave me this necklace and I love how it ties in with the colours of the outfit. I don't usually wear autumn tones, but I don't mind this outfit on me. Maybe my colours are changing as I am getting older.


I have a fairly rectangular figure with little waist definition, but I love how this tunic gives the illusion of a waist and hips. 

Does anyone else wish they had a stylist when taking blog photos? I find is so hard to get good photos with the garment sitting just right, when I am using the tripod and remote on my own. So often, it's not until I'm editing the photos that I notice all the faults. I guess most of us have this problem.


Happy Sewing


Thursday, 5 March 2015

Style Arc Lani Woven Tunic

I was immediately smitten with the recently released Style Arc Lani Woven Tunic.

Style Arc Lani Woven Tunic
The interesting design lines and the flattering shape was the draw card. I made up a straight size 12 (which is my usual Style Arc size) without any alterations.  I am wearing them with my Style Arc Barb's Stretch Pants made in Style Arc's stretch bengaline in midnight, which I have yet to blog.


In reality, this is not the figure flattering shape I was expecting. My tunic turned out a bit boxy, but to be fair, this may be due to my fabric choice. I used a lovely soft 100% cotton shirting, in a super fine check called sage, purchased from my new favourite local fabric shop...Patchwork on the Bay. Style Arc recommend linen, silk or any soft woven. I'm pretty sure the fabric I used would be classed as a soft woven, but it may have been a bit lightweight. I think this pattern would be best suited to a fabric with a bit more weight and drape so that it doesn't stand away from the body.


The interesting design lines can be seen a bit clearer in the photo above. I top stitched all the decorative seams to highlight them. There is a pocket inserted into the angled seam on the right hand side. The asymmetrical hemline at the front is a nice feature. It is a little tricky to get those corners mitred neatly but after taking my time I am happy with how they turned out. 


There is an armhole dart on the left hand side to add some shaping. Although the instructions are very brief there were several diagrams that were of great assistance in working out how all the pieces were to be joined together. I did deviate from the instructions, and sewed the sleeves in flat. They fitted the armscye perfectly without having to use any gathering stitches.


A lot of the decorative seams are cut on the bias so I took extra care not to stretch these edges before sewing. Sorry about the wrinkles, but I took these photos this afternoon after I had worn it to work all day.


The neckline is finished with a facing and it sits beautifully. My only gripe is that it is much higher than the illustration leads you to believe.


There are no closures required on this tunic. It slips on easily over your head.


Although I am a little disappointed in the overall look of my tunic, I am really pleased with the level of finish that I achieved. This pattern is a little challenging and was quite satisfying to sew. I might try this one again in fabric with more drape one day.

Happy Sewing

Saturday, 11 October 2014

Tropical Scout Woven Tee

 
Grainline Studio Scout Woven Tee with sleeves lengthened.
This is my fourth Scout woven tee from Grainline Studio. I have gradually been tweaking the pattern to suit/fit me and I am pretty happy with the fit I have achieved with this one. The neckline sits beautifully and it fits well through the shoulders. I have added length to the front and back so that it finishes at a more flattering level on my figure. I have also added some shaping into the side seams to take away the boxy shape. This is still easy to slip on without any extra openings. You can see my previous Scout posts here FirstSecondThird


I used a pretty tropical printed rayon purchased from Spotlight. For this one I lengthened the sleeves, following the tutorial from Grainline Studio here. It was a very easy alteration to do and creates a different look and makes it more trans seasonal.

Ollie was watching me through the window.
As you can see I have made another pair of Style Arc Elle Pants, this time in white stretch bengaline purchased from Style Arc. I made no alterations from the last time I sewed these pants. I have previously made black, navy and teal green Elle pants and they have proved to be real work horses in my wardrobe. I'm sure these will not be the last pair I make.


That's the problem with taking your own photos. There is no one to tell you to pull your pants down to smooth out those wrinkles.


This outfit was an easy sew and a practical and comfortable addition to my wardrobe.


Happy Sewing

Saturday, 21 June 2014

Style Arc Elle Pants Revisited

After digesting all the helpful comments on my last Style Arc Elle Pants blog post, I have made some more. 

Teal Style Arc Elle Pants
I purchased this lovely teal stretch bengaline from Style Arc. It is very good quality and beautiful to work with. This time, I tried a large calf adjustment. I couldn't find any info on this adjustment in my fitting books so I asked Google and found a wonderful tutorial on Colette Patterns Sewalongs

Back Pattern piece with large calf adjustment.
I added 2cm width at the hemline (in line with the grainline) on the back pattern piece. This gives more room at the back calf area without changing the seam lines, so everything still fits back together OK.

Side view
This adjustment has really improved the fit. The pants aren't getting caught up on my calves every time I move now, making them even more comfortable.

Back view
There are still some wrinkles but not as bad as my first pair, now that the fabric can hang better.

Close up of front
The waistband sits lovely and flat. Style Arc recommend using 35mm wide elastic. I used 20mm wide non roll elastic which worked out fine.

Close up back view
I previously raised the waist by 5 cm, but for this pair I lowered it by 1cm just fine tuning the fit. (So for this pair the waist was raised by a total of 4cm from the original pattern). I found that the original pattern was quite low waisted which is fine for the young slim girls out there, but for us more mature ladies it just cuts the muffin top in half...not a pretty look.

Midnight Style Arc Elle Pants
When I joined the Style Arc Membership Club I received this Midnight Stretch Bengaline as a free gift. It was just the right amount to make another pair of Elle pants. These were made exactly the same as the teal pair. Midnight is a very dark navy blue. The colour has a lovely depth and the fabric, like the teal was great quality and beautiful to sew.

Back view
I have styled these Style Arc Elle Pants with my Style Arc Stacie Jean Jacket. I'm really loving these Style Arc patterns and I took full advantage of their great sale recently for Style Arc Club members, so I plan to make quite a few more of their patterns soon.


Happy Sewing