Showing posts with label wool. Show all posts

Sunday, 13 August 2017

Sewaholic Hollyburn...a departure from my usual style.

Sewaholic Hollyburn Skirt
The Hollyburn Skirt from Sewaholic Patterns has been around for several years, and it has taken me forever to jump on the bandwagon. I have only purchased the pattern recently and I am kicking myself for putting it off for so long. 


The skirt comes with three length variations and the choice of belt loops or button tabs. All views have pockets too. I chose view A, which finishes below the knee, and I added the button tabs to the waistband. I am wearing it here with my Style Arc Elsie Woven Overshirt.


The fabric is a 100% wool suiting in navy with a subtle stripe. This fabric was a recent gift from my mother and it originally came from my grandmother's fabric stash. I have no idea how old it would be, but she passed away in 1988 at the age of 80 so it would have been purchased a number of years prior to that. It was a large piece approximately 3 metres long and 1.5 metres wide but a big section of it was riddled with moth holes. I had to carefully mark all the moth holes with chalk before laying out the pattern pieces in order to avoid them. There was plenty of undamaged fabric available for the skirt, and there is still a large piece left over for something else.


I cut a size 12 based on my waist measurement as this is the most fitted area of the skirt. My hip measurement put me at size 8, but I decided to make a straight size 12 as I liked the idea of a nice full skirt. I am really happy with the fit of the skirt so I'm glad I didn't try to blend sizes. If your hip measurement is proportionally larger than your waist measurement then you would need to grade between sizes.


I love the roomy pockets and how neat they turned out. The instructions with the pattern are very thorough and easy to understand. In fact I was amazed at how easy this skirt was to construct and how beautifully it went together. This would be an ideal pattern for a beginner sewist. I just love the shape of the skirt and it feels so elegant to wear.


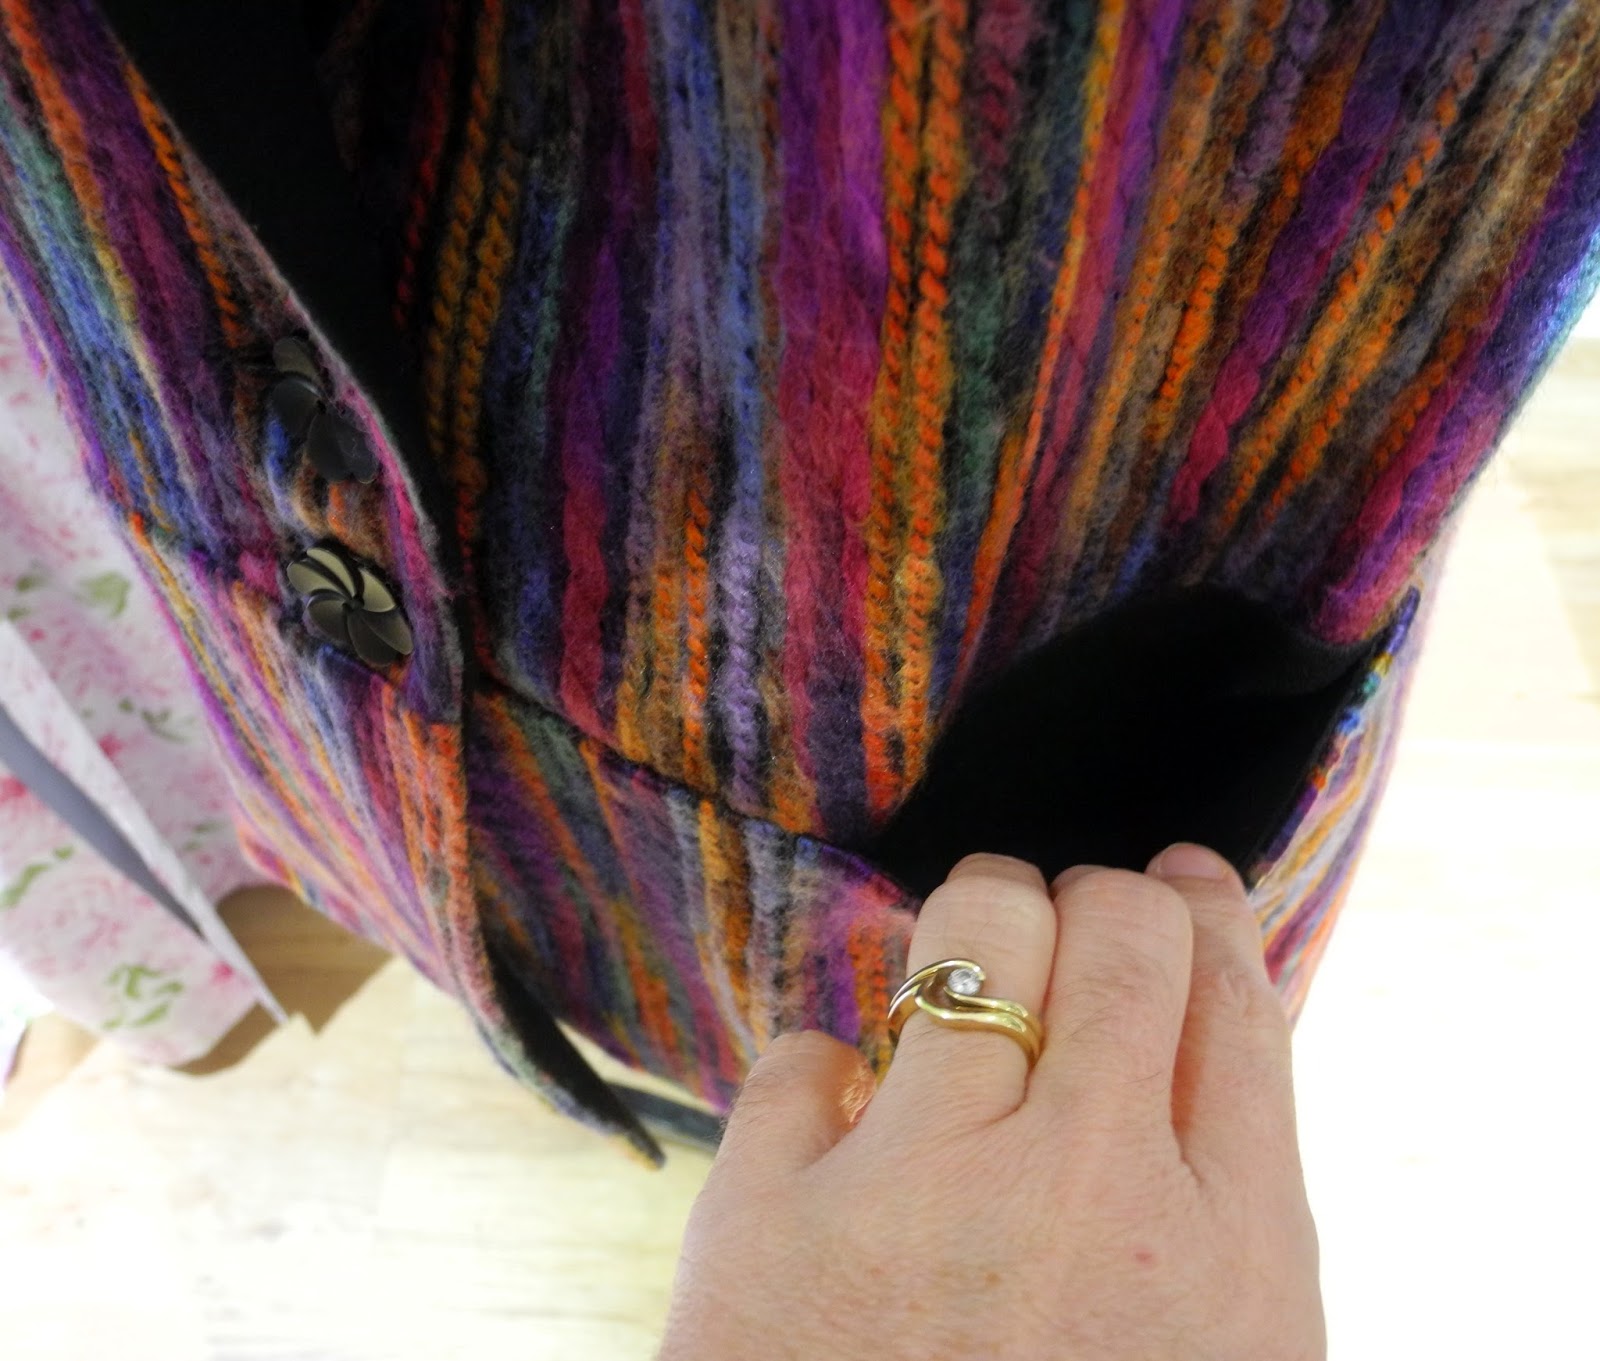
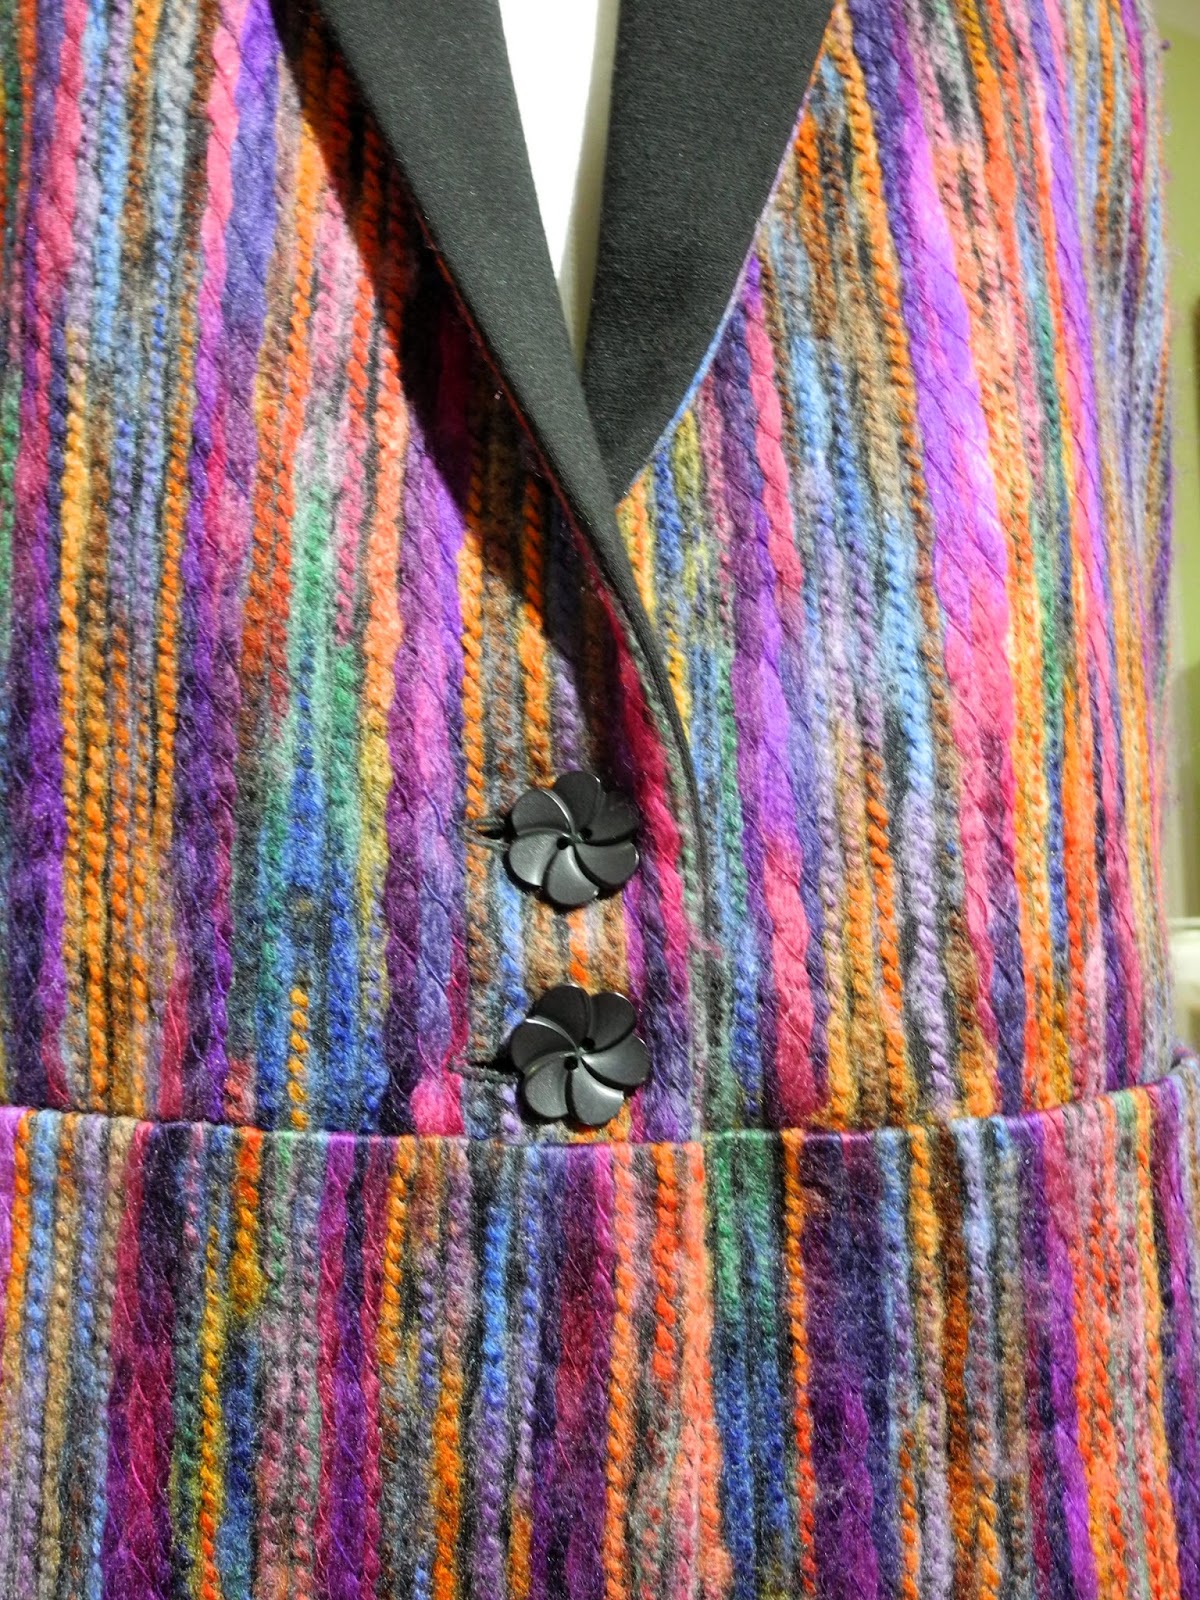
Here is a closer view of the button tab and the pocket. I cut the pocket with the stripes running the opposite way so I didn't have to worry about matching the stripes. The waistband is quite wide and sits high on my waist. I really like this and the way it gives the illusion of me actually having a waist. I did attempt to match the stripes on the centre front and centre back, creating a chevron effect, but this didn't work out perfectly. In fact this pattern is not recommended for striped fabric.  


 I used an invisible zipper in the centre back seam. The instructions recommend a regular zip so I hope this one holds up ok. I'm pretty happy with my zip insertion and getting the waistband lining up on each side. This did take a couple of attempts before I got it right.


I got carried away when constructing my skirt, and forgot to add the lining at the appropriate step. So silly, but it would have meant too much unpicking to go back and add it, so I decided to just hand stitch it in after the skirt was constructed. I'm so glad I added the lining, as it makes the skirt feel so luxurious when wearing it.


Here is a shot of the insides. I used french seams on the lining. The centre front and centre back seams were sewn on the machine, pressed open and raw edges overlocked. The side seams were overlocked together and pressed towards the back. I wanted to retain as much length as possible so I finished the hem off with some satin bias tape from my stash which was hand stitched to remain invisible on the right side.


As you might have guessed, I absolutely love my new skirt, even though it is quite a departure from my usual style. I really enjoyed sewing this wool suiting (quite a change from my usual ponte knits) and I think my Grandmother would have approved. 

Happy Sewing

Jean

Thursday, 6 July 2017

A Self Drafted Poncho

Self Drafted Poncho
I have been wanting to make a poncho for ages, so I did some research on Google and came up with this. I'm really pleased with my first attempt, but already have a few ideas for poncho's I may make in the future.

I found a simple tutorial at Hammers and High Heels for this cute poncho. The photo on the left was Carla's inspiration and the photo on the right is what she made.


After studying the tutorial, I quickly realised that the poncho made following the tutorial was not going to look like the inspiration photo. It clearly had a separate collar. So then I googled how to make a split lapped collar and found this wonderful tutorial at Off The Cuff - Sewing Style and I was off.


I used this lovely Indigo Wool Ponte from Knitwit that I had left over from my Style Arc Estelle Ponte Jacket. It's lovely and warm and perfect for this project. I cut a rectangle with the long side twice as long as the short side. The measurements I used were 160cm x 80cm. I then folded the rectangle in half to create a square and tilted diagonally so that the hem points are at centre front and centre back.


There is only one shoulder seam to sew. The other shoulder is on the foldline. I cut a small neckline at the top diagonal point (just big enough to squeeze my head through) and then I tried it on. To get a nice fit over the shoulders the seam needs to be curved over the shoulder and the other shoulder needs a dart added to follow the shoulder curve. This was all trial and error and took a bit of sewing and resewing to get it right. I also recut the neckline once the shoulders were sitting correctly.


Once I was happy with the size and shape of the neckline, I measured it and followed the collar tutorial, linked above, to add the split lapped collar.


I love how simple, yet effective this collar is. My only regret is that I didn't make it wider so it would have been a little more snug around the neck.


For a nice neat finish on the inside, I pressed the shoulder seam and dart open, and top stitched the seam allowances down. The hems were turned twice and top stitched.


This poncho has been a welcome addition to my wardrobe and can be worn over many outfits, including those with wide sleeves that are impossible to fit a cardigan over. I did find it tends to stick to my sleeves a bit, restricting movement. Nothing the addition of a slippery lining wouldn't fix. I have lots of ideas swimming around in my head for future versions.

Happy Sewing

Jean

Saturday, 25 June 2016

Style Arc Andrea Woven Vest


I am on a quest to make some warm clothes this winter, to keep me from freezing and the Andrea Woven Vest from Style Arc looked like a great layering piece to try. It was Sue's Post that convinced me to buy this pattern.


From the Style Arc website: "This forward trend of a long line vest will become a great addition to your wardrobe as it can be worn at anytime of the year as a layering piece. The vest is unlined. The pockets can have fashionable metal exposed zips if desired or just left as in seam pockets."

Style Arc Andrea Woven Vest
I have been a bit of a rebel and chosen fabrics not mentioned in the list of suggested fabrics: linen, crepe or any light suiting. I chose a multicoloured twisted wool blend from Spotlight. I saw this fabric in the catalogue back in March and I managed to buy the end of the bolt during my last visit to Spotlight in April. Unfortunately, there was not enough to make this vest...believe me, I tried every possible pattern layout. After some careful thought, I decided to cut the facings from some black ponte, as a contrast. The wool blend had a similar amount of stretch as the ponte so I thought they would work together.


My concerns with the fabric being too thick for this pattern were unfounded. It went together very well. The pattern is drafted beautifully with everything matching up perfectly. I cut my usual size 12.


I interfaced the ponte with a knit fusible interfacing which gave it the required stability. I'm wearing it here with a Style Arc Sara Skirt and a Deer and Doe Plantain Tee. It also works well with my Style Arc Barb Pants.


Sorry about the creases in the back view. The photo taken in the morning was totally out of focus, so this was taken late at night after I had been lounging in front of the TV, hence the wrinkles. My photographer didn't bother to point them out at the time.


The shawl collar rolls beautifully and now I have made it with the black contrast, I think this has turned out better than if I had used the wool blend for the entire garment. Happy accident!


I also cut the pockets from the black ponte and I chose not to add the zips. (Actually, the thought of adding zips just terrified me).


The button holes are not my best work so we will just focus on these cute buttons. I had these in my button stash from my Colette Beignet Skirt.


And here are some inside shots showing the facings. I finished off the raw edges of the fabric on the overlocker prior the stitching the seams on the sewing machine. This allowed me to press the seams open which I thought would work the best in this bulky wool blend.


The only really tricky bit was sewing the facing to the armholes. I had to reread the instructions several times before I figured out how to do it, and it was quite fiddly but came together quite well in the end.


This is one of those patterns that you don't see much on the internet, and I really can't understand why. I am very happy with mine and I will probably make more.

Happy Sewing

Monday, 20 June 2016

Style Arc Estelle Ponte Jacket


This is a fabulous jacket that I have been itching to make for a while now. Megan and Sue have both recently made this jacket and after a long wait the pattern finally arrived from Style Arc and I couldn't wait to get started. (This delay seems to be an Australia Post issue.)


As described on the Style Arc website "This fabulous jacket is not just easy to wear but it is very easy to make. The knee length and the gorgeous waterfall collar makes this jacket a great trans seasonal addition to your wardrobe. A project you can complete in an afternoon."

Style Arc Estelle Ponte Jacket

I had this gorgeous indigo renewal wool ponte purchased from Knitwit with intentions of making some sort of warm jacket. I work in a chilly office and I am determined to make some warmer things to keep me from freezing this winter. At $49.95 a metre I was nervous of making a wadder, but after doing lots of research and knowing that Style Arc patterns generally fit my body shape quite well, and that this was a loose fit style, I went ahead and cut a size 12.


And I am very happy with the result. These photos were taken in a rush this morning just before I left for work. I am wearing it with a Colette Mabel Skirt and a Deer and Doe Plantain Tee. I can see it working with lots of other things in my wardrobe too, and after wearing it today I am happy to say it was warm and comfortable...just what I needed.


This is a photo I posted on IG on Saturday night, with all the edges left raw. The general consensus was to leave the edges raw, which both Megan and Sue have done. I left it overnight but Sunday morning I decided to finish off those raw edges. It just didn't look right or feel right to me, left like this. Even though I had used a rotary cutter and the edges were quite neat, they were not perfect.


The instructions say to sew the seams as "flat seams". This means sew the seam, then trim away the left seam allowance, then turn the right seam allowance over the cut away left seam and stitch the seam allowance down. This creates a nice flat seam, similar to a flat felled seam, without tucking the raw edge under. Can you spot the huge mistake I made in the photo above? Yes, I sewed the back collar seam inside out so that the raw edge is visible when the collar is folded down. I was too far into the construction before I realised my error...but I think I can live with it.


I deliberated long and hard about how to finish off the raw edges. The ponte is quite bulky and I could see it would be difficult to do a neat job of turning a 1cm hem twice and stitching. I quite like the look of the flat seams on the inside so I embraced this look and simply turned a 12mm hem in a single fold and stitched very close to the raw edge. Although this is quite a simple technique, it took me ages to accurately measure, press and pin the entire edge of this jacket. I knew this finish would only work if it was done very neatly and I am very happy with the result.


With the waterfall front on this jacket the wrong side shows below the turn of the lapels. If I continued to turn the hem the same way around the bottom edge of the jacket, the wrong side would be showing, so I decided to switch directions at the bottom front corners. You can see this corner in the photo above. I trimmed a square from the corner to remove some bulk and I used some Vliesofix-bondaweb-tape to help hold them securely. This resulted in a nice neat corner.


I finished the sleeve hems exactly the same way, which meant I didn't lose too much length, and they visually match the rest of the jacket.


Above is a shot of the inside showing the flat seams at the shoulder and armhole and also the wrong side of the lapel edge finish.


And another inside shot showing the in seam pocket. I finished off the side seams with the overlocker because it was late and I was getting tired and I couldn't think how to do flat seams with the pockets.

This jacket took me much longer than an afternoon to construct, but if you leave the edges raw it is an easy and quick sew. I am so glad I spent the extra time finishing the edges...to me it was well worth it.

Happy Sewing