Sunday, 27 October 2013

The Birthday Shirt

Well, I have finally made my partner a proper men's shirt. (I have been promising this for a while now), just in time for his birthday.


In preparation to make this shirt, I purchased Pam Howard's "The Classic Tailored Shirt" from Craftsy. This class was fantastic. Pam is such a great teacher. She explained every step of making a classic tailored shirt very clearly and demonstrated every step in great detail. She even made a couple of mistakes herself, but then explained and showed how to fix those mistakes. I learnt so much from this class and it certainly gave me the confidence to make my own classic tailored shirt.

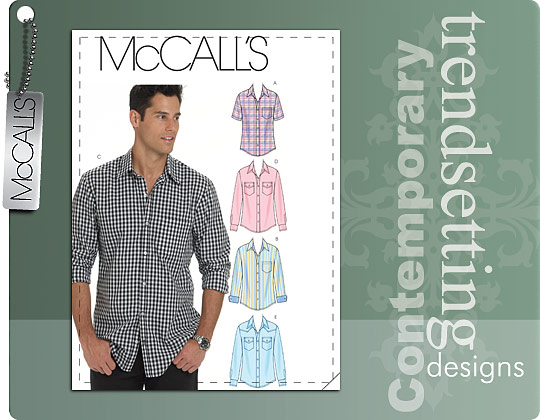
I used McCalls 6044 in a large with a few alterations.


I eliminated the separate front band, by cutting the front band and the shirt front as one piece. I also eliminated the seam in the two piece sleeve, so that the sleeve was only one piece. I redrafted the back of the shirt to create a proper yoke and yoke facing. I made these changes simply to make the shirt pattern more like the Kwik Sew pattern that Pam was using in the class. I also made a tower placket. The Craftsy class did not cover a tower placket, only a continuous placket was demonstrated. However, Pam did provide a pattern for a tower placket in the class notes and a link to her Tower Placket Tutorial.

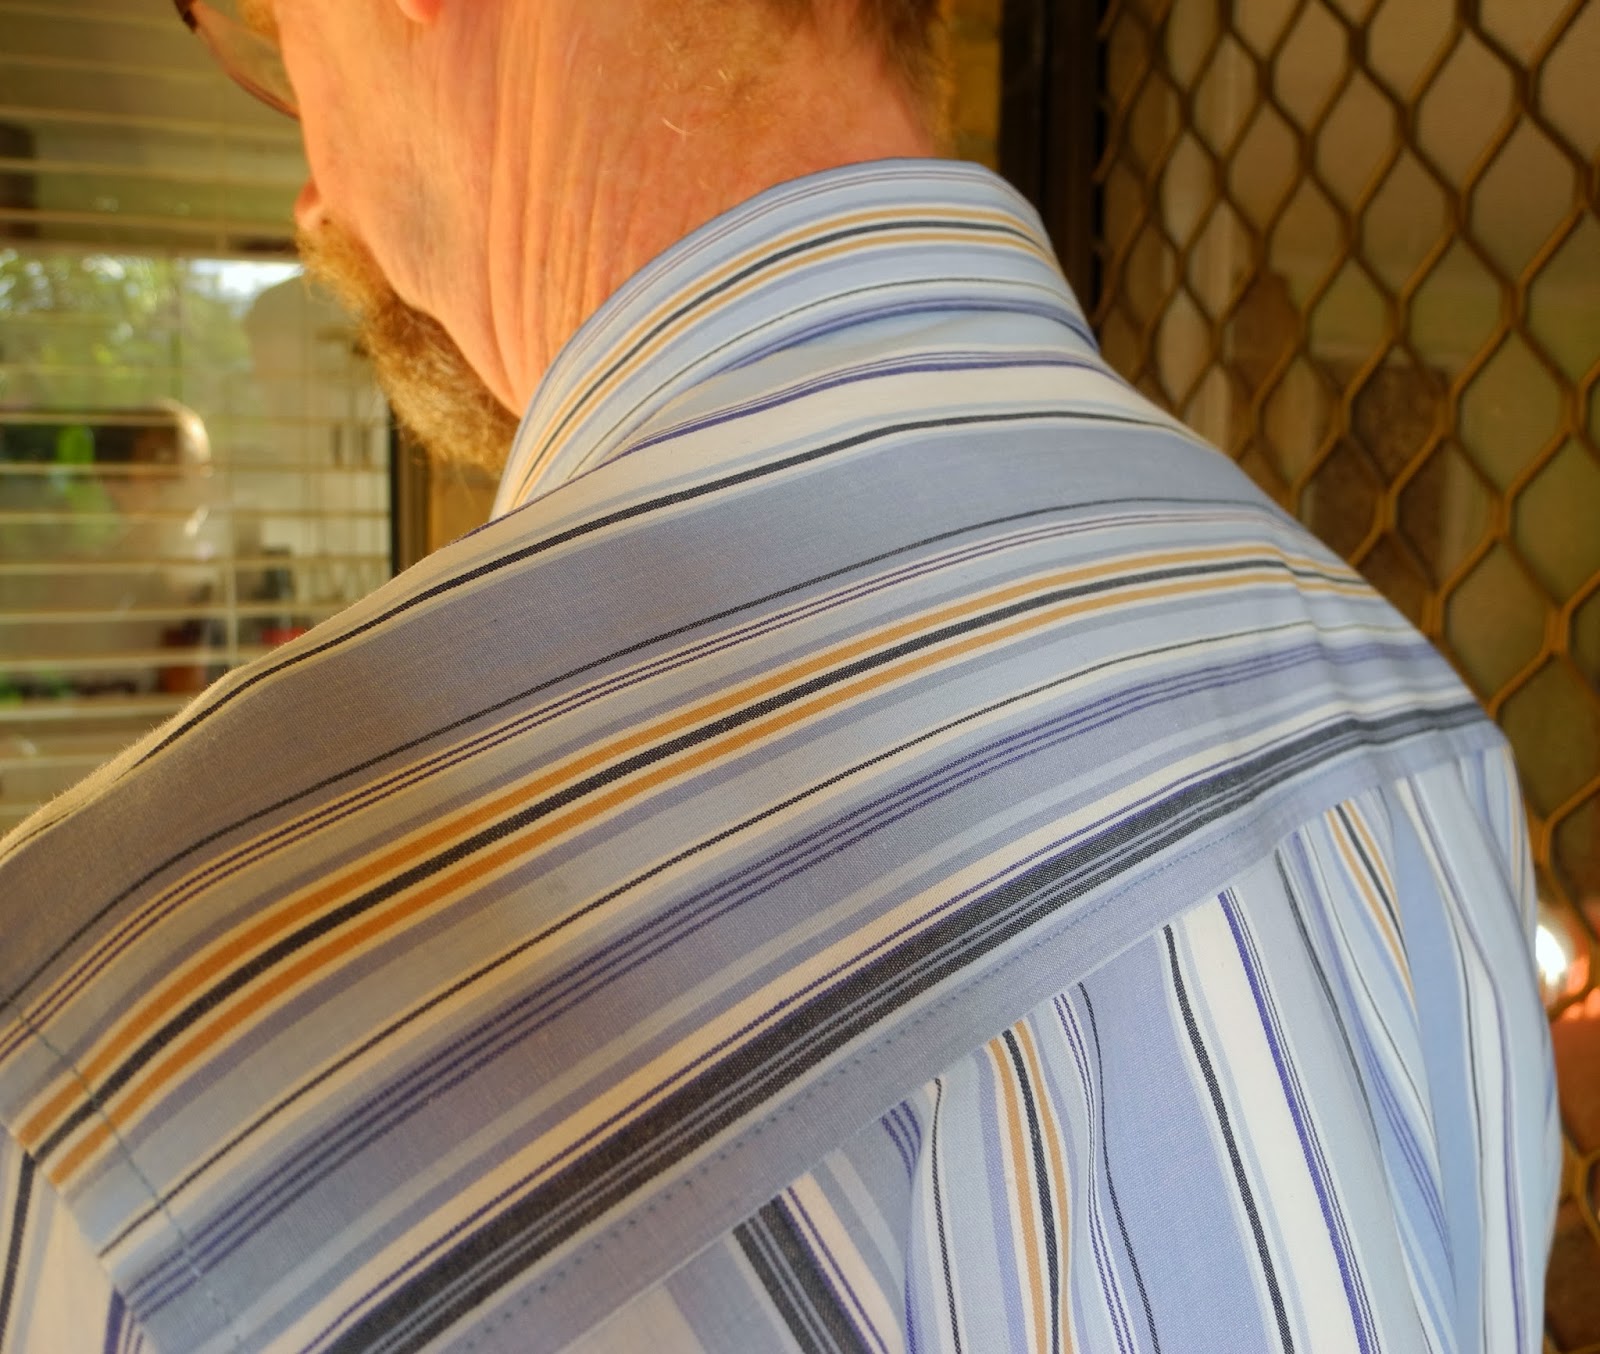
The fabric I used was 100% cotton shirting purchased online from The Remnant Warehouse and I see it is still available. It was a lovely soft cotton and easy to work with. Although the stripes gave me a headache during the cutting out process. It took a lot of time and thought to get the stripes placed to look their best on the pattern pieces. I was quite pleased with the result. In fact, I matched the stripes so well on the pocket that it is almost invisible.


Pocket


Here are some photos during construction:


Pam's Yoke Trick (aka Burrito method)
After joining shirt fronts to shirt back outer yoke at the shoulder seams, the shirt fronts and shirt back are rolled up exposing the yoke facing, which is then wrapped around the rolls (like a burrito) and pinned to the shoulder seams. After sewing these seams, the rolls are gently pulled through the neck opening revealing a lovely neat fully enclosed yoke.
Yoke facing offset slightly to avoid pulling before stitching shoulder seams.
Setting the sleeve in flat with the "Flat Felled" seam pinned and ready to sew.
Collar and Collar Band ready to attach to neckline. 
Inside: Intersection of  Flat Felled side seams and armhole seam.
Inside of shirt tail hem.
Tower placket and cuff.

I really enjoyed the construction of this shirt. Everything was finished off so neatly. As Pam Howard said "You could wear this shirt inside out if you wanted to". There was some hand stitching involved. The collar band and the cuff facings were hand stitched using a fell stitch, and the buttons were sewed on by hand. This was a nice touch and as Pam Howard said " it makes it a handmade shirt. You can sew a shirt entirely by machine, but you can go to the shops and buy one of those." I have to agree that the little bit of hand sewing made the construction of the shirt more personal and I felt that I was putting a lot of love into it.


Front


Back
Collar
Back yoke and collar
Cuff and sleeve pleats
Overall I am really pleased with how this shirt turned out. My partner even wore it out in public when we went out for dinner to celebrate his birthday. There are a couple of changes I will make for the next one ( and yes, there will be a next one or two or maybe even three). I will add about 6cm to the sleeve length and also increase the length of the tower placket. My partner is very tall (6' 4") and slim and he has extra long arms.

And to finish off....how appropriate was this birthday card?


Happy Sewing 

Sunday, 6 October 2013

Three Easy Tops

Top No. 1

I have made another Sewaholic Renfrew. This time I made view B with the V Neck.


Fabric used was a grey cotton jersey. This was quite a stable knit and sewed well. The neckline is pulling a bit in this photo because of the way I have my arm positioned.


You can see how well the neckline sits when my arms are by my side.


And here is the back view. I am quite happy with the fit. The sleeves are a bit long but being cotton there may be some shrinkage, so I was allowing for this.


I was very happy with the V Neck. The instructions were very clear and made this quite easy. I finished the neckline with a twin needle rather than zigzag as the instructions suggest. I think this gives it a more RTW finish and stops it looking home made.


I have finally parted with my overlocker and sent it off for a well needed service. Therefore, I sewed this top entirely on my sewing machine, finishing the seams with a zigzag stitch.


This will be a great casual top for the weekend.

Top No. 2

Dolman Sleeve Top from Cation Designs which is a free pattern.


This a great little pattern that has been popping up quite a bit lately. I have made this previously (Pattern Review) but the neckline was a complete disaster.


For this one I changed the dimensions of the neck band from 24" x 1.25" (61cm x 3.2cm) to 21" x 2"(53.3cm x 5cm) This worked out much better. I also used the length and the hem band from the Sewaholic Renfrew. Fabric used was a jersey left over from my Wrap Dress


I finished off the neckline using a zigzag stitch which I thought suited the fabric design better than a twin needle finish.


This is a great addition to my weekend wardrobe and a great way to use up some leftover fabric.

Top No.3

This one is a combination of the Cation Design Dolman Sleeve Top and the Sewaholic Renfrew V Neck Top.


Fabric choice can make a huge difference. The fabric I used for this top was a very fine knit (unknown content) that had a lot of drape and not a very good recovery. This had sat in my stash for a while. I didn't quite know what to do with it so I thought it would do, to try out this pattern combination.


See all that fabric pooling at the back? This is exactly the same back pattern piece I used for Top No. 2 (except for the neckline), and I didn't have any fabric pooling problem with that one. Also the sleeve bands are too loose. You might notice that the hem band is a little narrower too. I cut the original one off and removed nearly 7 inches before reattaching it.


This fabric is really tissue thin. I purchased it online, thinking it looked like a sweater knit from the online photo...I was bitterly disappointed. I guess that's the risk you take when ordering online.


You can see how thin it is in the shot above where the flash has picked up my bra through the fabric.


One thing I was really pleased with was the V Neck on this top. It turned out really neat, so I guess I will be making a few more of these easy tops in the future. (Just have to be quite careful choosing the fabric).


Happy Sewing

Saturday, 28 September 2013

Springtime Style Arc Nina Cardigan

I have made myself another Style Arc Nina Cardigan for spring.


Spring has sprung in Australia and I have been enjoying the sweet scent of the wisteria growing on our side fence. Thought it would be a pretty backdrop for my purple Style Arc Nina Cardigan. Style Arc are an Australian pattern making company based in Melbourne. I have made a few of their patterns and have been very pleased with them all and I have noticed lots of favourable reviews for Style Arc on Pattern Review as well. Check out Anne's blog Clothing Engineer for lots of reviews of Style Arc patterns.

Nina Cardigan


I have made this cardigan previously (pre blog) and posted a review on Pattern Review. This review has a lot more construction details and detailed photos.


I love the flattering front folds and draping of this cardigan. It has a very slimming shape which is great for my rectangular figure (not much of a waist).


For this one I used a light to medium weight jersey with a lovely drape. Not sure of the fabric content. I sewed this mainly with my overlocker and finished the hems using Lite Steam A Seam 2 and sewing with my twin needle. I did have one major blunder while overlocking the seams. When you use the overlocker you lose a lot of control over keeping the layers of fabric perfectly together. This resulted in the centre back seam being very badly matched with the waist seam. I didn't realise this until I had overlocked the entire seam and I was not going to attempt to unpick all that stitching. This bugs me to no end, but I have since found a helpful tip to avoid this problem over on Karen's blog Did You Make That. I will definitely be using this tip next time.


Hope you are enjoying sewing for the change of seasons...Autumn (or Fall) for the Northern Hemisphere and Spring for us "down under".


Happy Sewing

Monday, 9 September 2013

The Perfect Fit (the finished result)

It has been a long road and a steep learning curve, but I have finally finished the outfit previously blogged about here. I had challenged myself to make an outfit, combining elements from three different patterns and putting into practice the fitting skills I had learnt from the Craftsy class Sew The Perfect Fit with Lynda Maynard. The outfit was to wear to my nephew's wedding so I was under pressure to have it completed by September 7th. I finished with a couple of days to spare.

Here are some photos taken at the hotel where we stayed just before leaving for the wedding.


Front view

Back View (this makes me look very bow legged)
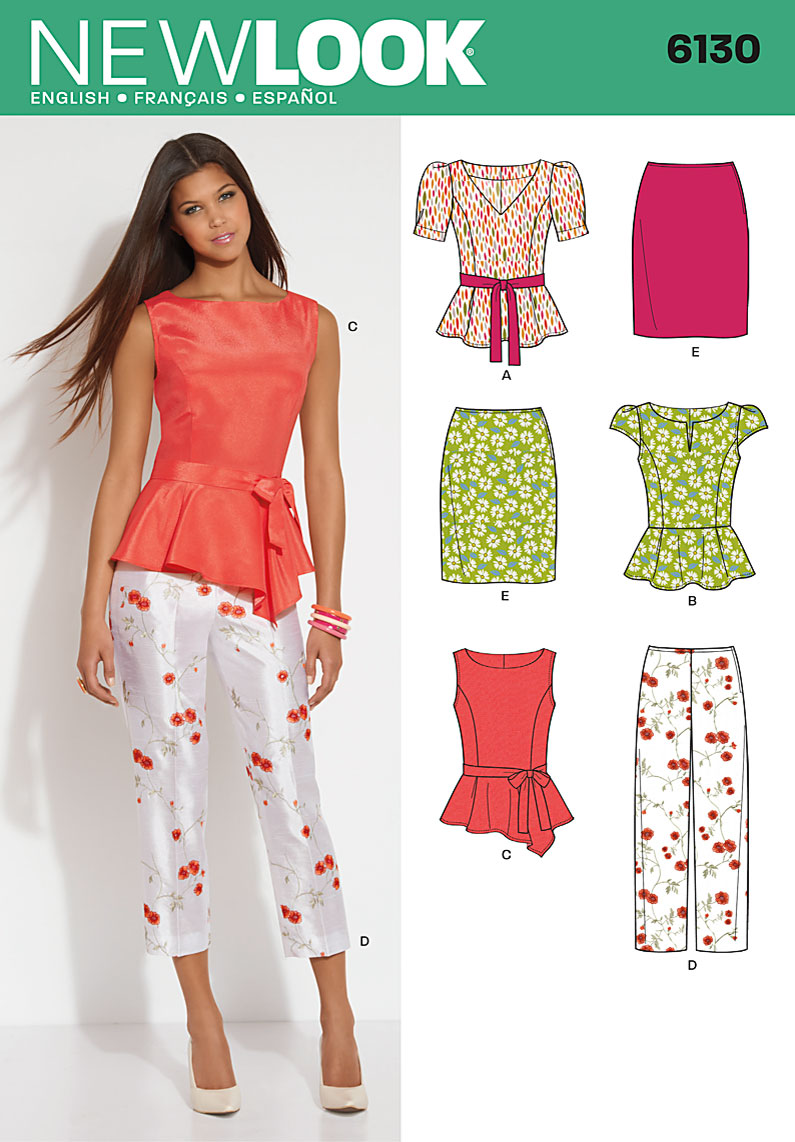
I used the bodice from New Look 6130, the sleeves from Vogue 8766 and the skirt was BHL Charlotte Skirt. The fabric I used was Purple Rose Brocade purchased from Spotlight and I used a black anti static Italian Lining also purchased from Spotlight. The brocade frayed madly the minute it was cut, so I overlocked the raw edges as soon as possible. This seemed to keep the fraying under control. 

Peplum detail
I loved how the peplum turned out. Because the brocade was quite stiff, it gave the peplum plenty of body. I ironed the pleats right down to the edge to get them to sit properly. It was difficult to iron a straight crease in the areas cut on the bias, so they are not perfect.

Neckline and bodice.
I was very pleased with how nicely the neckline sat with no gaping. It really is well worth the effort of making a muslin and getting the fit right.

Darts at the sleevehead
Here is a close up of the darts at the sleevehead. I love how neatly they shaped the sleeve and it was very easy to ease into the armscye.

Invisible zip
I was very pleased with my invisible zip insertion. It worked perfectly, first go and even matched the waist seam perfectly. I used the tutorial from The Coletterie

To hem the peplum there was one corner that needed to be mitred. I had to practice a lot on some scraps because it was not a perfect right angle and I new that the brocade would not be very forgiving if I stuffed up and had to unpick. To my amazement, it turned out really neat.

Mitred corner right side.

Mitred corner wrong side
Here are some detailed shots of the inside and lining.


Back
Front. I used purchased satin bias binding to cover the overlocked edge of the facing.
Inside sleeve hem. Satin bias binding used as hem tape.
Back. I bound the end of the zip because it was loo long and I had to shorten it.
The lining was sewed by machine to the neckline and the zip, and then hand sewn at the sleeves and the waist.

I had to make quite a few fitting changes to the Charlotte Skirt. I removed 2.5cm from the top of the skirt, which shortened the darts and I reshaped the side seams to match my curves (or lack of). I removed another 7cm from the bottom of the skirt before hemming. This skirt pattern is very long. I also added a slit at the back seam. Without this, it was impossible to walk in this skirt. I was surprised this was not included in the pattern or instructions.

Back slit to enable walking.
Inside back slit.
This inside shot reveals my big mistake. This is why you should not sew late at night when you are too tired to be thinking straight. I cut the lining too short. I had cut off 7cm from the brocade at the hemline, so I proceeded to cut an extra 2 cm off the lining, so that it would be 2cm shorter than the skirt. (But I forgot that I added the satin bias tape to finish off the hem). Too bad...I was not going to start again.

I attached the lining to the slit by machine so that it would not show. This is a technique I clearly need to improve on.

Lining hem
I used a decorative machine stitch to sew the lining hem.

I have learned a lot during the planning and construction of this outfit, and improved some of my sewing skills. I am convinced that it is definitely worth the effort of making a muslin to get the fit right before cutting into the good fabric.


A couple of shots from the wedding

 A big thank you to my Mum for all her help during the fitting process. I couldn't have done it without her.
Me with my two sisters. Didn't the colours of our outfits look pretty together?

Now onto the next project...


Happy Sewing