Showing posts with label tops. Show all posts

Wednesday, 15 March 2017

Style Arc Ginger Knit Top #3

Style Arc Ginger Knit Top

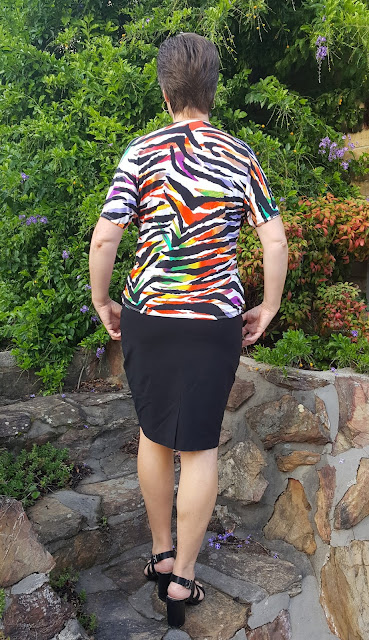
I've used this outrageously multicoloured knit from Knitwit to create another Style Arc Ginger Knit Top. The fabric is still available and is currently on sale for $12 per metre. This is my third time sewing this pattern, and I doubt it will be my last. Here are the links to my first version and second version. It's just perfect for work, loose fitting, comfortable yet stylish and works well with pants or a skirt.

Style Arc Ginger Knit Top

I sewed this up on Sunday afternoon and wore it to work on Monday, so it's almost one of those instant gratification patterns. The most difficult part of the construction is sewing the pleats. I always find pleats in a knit a bit of a challenge.


This knit was only a two way stretch, not a four way stretch like my previous versions and it did alter the fit slightly. This one feels a little shorter as it has no vertical stretch. The print has quite a lot of orange in it and that's not a colour that suits me very well. I spent quite a bit of time positioning the pattern pieces on the fabric to include as much of the green and fuschia pink to offset the orange.


I love that this fabric requires zero ironing. It is so easy to care for and wear which is a huge plus when I am rushing to get out the door in the morning, heading to work.


All the hems were sewn with my coverstitch. I am wearing it here with a Style Arc Sara Skirt (which I have pegged in quite a bit at the hemline) in a black stretch bengaline. I made this skirt ages ago and is a great work wardrobe staple.


Repeat patterns are awesome and as I have made my three tops from completely different prints, I doubt if anyone, except another sewist, would realise that I had used the same pattern for them all.

Happy Sewing

Jean

Wednesday, 22 February 2017

Style Arc Rae Tunic


Style Arc Rae Tunic
I chose this lovely Poly/Spandex knit from Knitwit to try out the Style Arc Rae Tunic. I love a good tunic and I have been wanting to try out the cold shoulder trend for a while now, so this pattern ticked all the boxes for me.


Style Arc Rae Tunic
Suggested fabrics are crepe, silk or even a knit. That makes this a very versatile pattern. I dispensed with the button and loop back neck closure, as it was not required. The tunic slips easily over your head (in a knit, anyway).


I cut my usual size 12, with no alterations, but in hindsight I probably should have done a forward shoulder adjustment. The tunic is quite loose fitting and skims nicely over any lumpy bits.


I like the length of the tunic...plenty of backside coverage. I am wearing it with my Style Arc Elle's in white stretch bengaline, made ages ago. This tunic only takes 85cm of 148cm wide fabric (sizes 4-16, slightly more in the larger sizes). You must have a seam at the centre back to squeeze it out of this yardage though.


Application of Bondaweb to hems
I have found when working with these slinky poly/spandex knits, the application of Bondaweb to the hems assists in stabilising the area and results in perfect stitching. I also used Bondaweb in the shoulder seams as I wanted that extra stability for the top stitching.


Sewing knits with my walking foot.
My walking foot also helps enormously when sewing with knits. It's great to learn all these little tricks and see the quality of your sewing improve. 


Loving the cold shoulder feature and it's perfectly bra friendly too. I used a knit binding turned completely to the inside, and top stitched, to finish off the neckline.


Another great feature of the Rae Tunic is the curved hem.


This photo shows the real shape of the tunic with the cut on sleeves. After wearing this to work today, I can report that it is very comfortable and I enjoyed wearing it. I have two pieces of rayon purchased recently with this pattern in mind. It will be interesting to see how it compares in a woven fabric to this one in a knit.


Happy sewing

Jean.

Monday, 6 February 2017

Style Arc Courtney Top from Leftovers


The Style Arc Courtney Top is a great pattern for trying out some colour blocking. I was rummaging through my fabric stash looking for something suitable, when I came across the left over floral cotton/linen blend from this dress and the white linen left overs from this shirt. I had just enough of both the fabrics to combine the two and create this top.

Style Arc Courtney Top
  
This top has some lovely design features and was fairly quick and relatively easy to construct. There are no darts or closures to worry about and the fit is meant to be loose, so there are no fitting issues to deal with either.


I love the combination of the plain and the busy fabrics. I think the white tones down the busy print and the combination has worked well. I am wearing it here with my purple Colette Mabel skirt which tones in well with the purple flowers in the floral print.


Even in this cotton/linen blend fabric, the shape of the blouse is not too boxy or shapeless. I love the interesting detail that the back yoke and gathers give to the back. I cut a size 12 and made it up with out any alteration to the pattern. It was drafted beautifully and went together easily.


I top stitched all the seams, except the side seams. I like the extra detail it adds to the top and it also keeps the seam allowances lying nice and flat. The arm bands are designed to be turned up like a cuff, but I preferred them left like this. The white arm bands help tie in the front panel and give a nice balance to the garment.


The raw edge at the hem was over locked and turned up and secured with a top stitch. I wanted to preserve as much length as possible. If I was to make this again I would lengthen it a couple of centimetres, especially if I planned to wear it with pants, rather than a skirt. I have a long body and I find a longer top suits my figure better.


The neckband is a length of bias cut linen stitched to the neckline and then cover stitched to finish it off. I have still got my L plates on with my cover stitch machine, but I was pretty pleased with how this turned out. A little bit wobbly on one shoulder, but not too bad.


I am quite pleased with my Courtney Top and very pleased that I was able to create it out of some left over fabrics too. I can see a few more of these in my wardrobe soon.

Happy Sewing

Jean

Sunday, 4 September 2016

Style Arc Esme and Elle

Style Arc continue to be my go - to pattern company. I find most of their designs suit my lifestyle and taste. The Esme Designer Knit Top and the Elle Pants are patterns I have made numerous times and are firm favourites.


This is the first time I have made the Esme with sleeves. The only pattern alteration I made was to lengthen the body by 5cm, the same as my previous versions, see blog post here and here. This length is much more flattering on my figure.


I like the bottom coverage at the back. The fabric is a deluxe ponte from Spotlight in a lovely fushia pink. I am continually tweaking the Elle pants pattern trying to achieve that elusive perfect fit. I still seem to have far too many wrinkles, but maybe this is the nature of slim pants? Fabric used was denim blue stretch bengaline from Style Arc. They have the best bengaline...great quality.


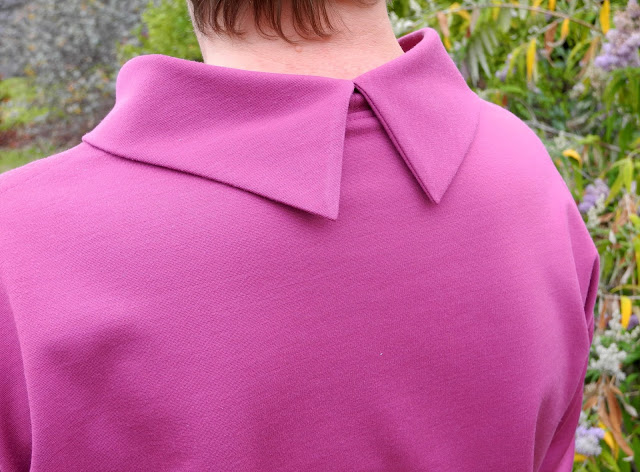
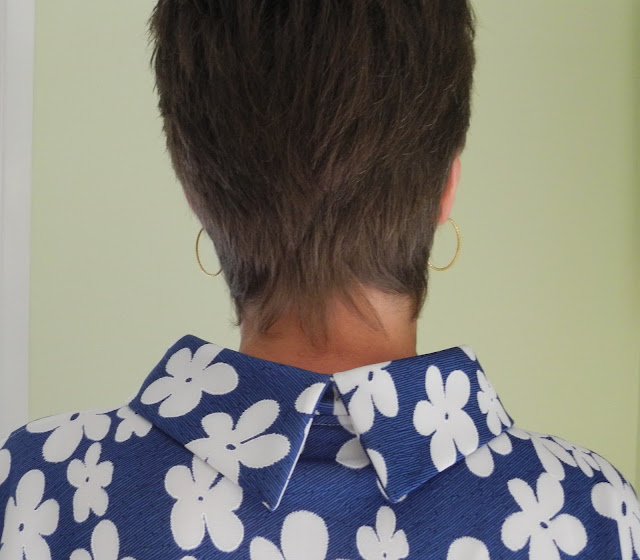
As instructed, I pressed the seams open and top stitched them down. I like the subtle interest this gives the top. The collar is my favourite feature and it turns out so beautifully, especially when cut on the bias.


This pattern is drafted very well, and everything turns out so neat. I must say I prefer the sleeveless version. I think it works better. The addition of the sleeves creates extra fabric folds at the underarm/bust area which just don't look quite right. Despite this, I have worn this top many times since completion back in May (you may have seen a sneak peak during Me Made May) and it works equally well with long pants or a slim skirt.


The top stitching down the side seams continues down the side split and across the deep hem and back up the other side.


Even though I love the collar on this top, I would like to make the collar less version so I can accessorise with a scarf or long beads. The collar limits how you can accessorise.

Two garments that have already seen a lot of wear in my wardrobe already.

Happy Sewing

Saturday, 30 April 2016

Deer and Doe Plantain Tee and Style Arc Wallis Pants

Why have I waited so long to try this wonderful pattern?


The Plantain T-Shirt is a free downloadable pattern from Deer and Doe, that has been around for quite a while, yet I have waited until now to give it a try. I was after a top to wear out to a work dinner, that would be suitable to wear with my black Style Arc Wallis Pants. It needed to be evening appropriate and a quick sew as my time was limited. The Plantain T-Shirt was the perfect candidate.

Deer and Doe Plantain T-Shirt

I had this black and silver sparkly knit in my stash which had been bought ages ago from Spotlight for a completely different project that never eventuated. This fabric also met the criteria for this top.


I cut a size 44 and added 8cm to the length to make it more tunic length. In hindsight I should have added a little more to the length as I could only turn up a 1cm hem without making it too short. I love the shape of the neckline on this top, and the general shape of the T-Shirt is quite flattering...being fitted in the shoulders and across the bust, yet skimming loosely over the tummy and hips.


Although I am very happy with the fit of the front, the back needs a little more room to skim over my backside without getting caught up. This will be easily fixed for the next one.


There are generous 5/8th" seam allowances thank heavens, as I could see that this top was going to be too tight on me when I tried it on Vera during construction. The fabric has only a small amount of stretch and I should have allowed for this by cutting a larger size. I was able to save it by sewing 3/8th" seam allowances at the side seams.


The Style Arc Wallis Pants were sewn last year, but I never got around to blogging them. They are made from a lovely black ponte purchased from Style Arc. It has an excellent recovery so they don't bag out at all.

Style Arc Wallis Pants
I cut a size 12 and added a large calf adjustment to cater for my extended calves. The line drawing is incorrect. The curved side seam begins at the usual position for a side seam and curves toward the front at around hip level. It does not start from the back as the line drawing suggests. I am quite happy with the fit of these pants and they have been a really useful wardrobe staple.


Stay tuned for more Plantain Tees.

Happy Sewing

Tuesday, 19 January 2016

Colette Mabel Skirt & a repeat of the Style Arc Esme Top.


Colette Mabel skirt worn with Style Arc Ann T-Top. The denim jacket is RTW.

I have made the Mabel skirt from Colette Patterns several times before... see here and here, although I have not been completely happy with the fit until now. This is a great pattern for a simple knit skirt, but I have found it does need a little tweaking, depending on the fabric used. The stretch factor of different knits can vary so much.


This fabric was originally bought with the Style Arc Esme Designer Knit Top in mind. It is a gorgeous printed scuba knit that I purchased from Spotlight a while ago. It just screamed casual summer to me...specially when combined with white. I did make the Style Arc Esme Top and I managed to eke out the Mabel skirt from the left overs as well.


I made version 1, without the design seam lines on the front, and lengthened it considerably. I had planned to add the kick pleat at the back, but the amount of fabric I had left did not stretch quite that far. Instead, I created a split in the centre back, for walking ease. This seam was pressed open and then the seam allowances were top stitched down. I find scuba knit to be very springy and hard to get to lie flat, but this worked a treat. I used some left over white cotton lycra from the T Shirt to line the waistband.


Instead of just rushing ahead with this one, I decided to take my time and work on getting the fit more to my liking. I machine basted the side seams several times before I was happy with the shape. From memory, I pegged the skirt in a little from around the hip line down to the hem, to create a little more of a curve. My body is rectangular in shape, so benefits from any added curves. I also added elastic to the waistline, as I find it slips down without it. The hem was hand sewn.

Don't mind the snoozing dog.

Now onto the Style Arc Esme Designer Knit Top that was the original reason I bought this fabric.


 This is the second time I have made this top. The first one was made in a ponte knit which sewed up beautifully. This time I used this printed scuba knit. The scuba knit was not as well behaved as the ponte and I did have to unpick and redo a few bits, so overall it was a bit more fiddly to sew.


I kept the pattern pieces exactly the same as my first Esme, including the length alteration, as I was happy with the fit the first time around.


Again, I have paired it with white. This fabric combination just looks so fresh and summery to me. These denim pants are RTW purchased from Rockmans a few years ago. As my 23 year old daughter was taking these photos for me, she made the comment that "Mother's look good in white pants". I questioned why she thought that and her reply was that "she could never keep white pants clean". I thought that was quite amusing...as if mothers have some super power to keep their white pants clean...I actually find it a struggle.


The collar was cut on the bias and sits beautifully in the scuba knit, just as it did in the ponte. Don't try and skimp on fabric to cut this on the straight grain. I don't think it would sit nearly as nicely as it does on the bias.


I had a bit of trouble getting the collar points to look as good as the ones in the ponte, but they are not too bad. I had picked this side to be the one I wanted to show as it looked the best, but I somehow got confused and sewed it on inside out. Glad I persevered and unpicked it, and resewed it on the right way. 


Both these garments were sewn during my Christmas/New Year break from work. In fact, I could have called it a Sewcation. I don't think I will ever wear this top and skirt together though...far too matchy matchy. What do you think?

Happy Sewing

Friday, 15 January 2016

A Style Arc Ginger Knit Top for Jungle January

There's nothing like an animal print and a loose fitting top to camouflage those extra few pounds that have crept on over the festive season.


I managed to whip this top up over a couple of evenings during my first week back at work, and wore it to work on Friday with my Style Arc Barb Pants. I have made this top once before here, so it seemed easier the second time around.

Style Arc Ginger Knit Top

This top is really quite a simple, yet stylish design. The front shoulder pleats and the cross over wrap create a flattering fit, and the top works well with pants and would look great with a slim fitting skirt too.


The fabric is a gorgeous jersey purchased from Style Arc a while ago. It is very good quality with a lovely drape...perfect for this pattern.


There are only three pattern pieces: front, back and back neck binding. The back is the full pattern piece so it can be cut out in a single layer. You are supposed to cut one pair of the front piece, but I found this pattern piece was too wide to cut on a double layer (fabric folded in half), so I had to cut it out on a single layer too, carefully remembering to flip the pattern piece over so that I was cutting a pair, and not two identical pieces.


The wrong side of the fabric does peek out a little at the front hemline when standing a certain way. This was a huge issue with my first version and I had to remove a large wedge of fabric from the under layer to stop this occurring. I made this version exactly as per the instructions and have not had a problem, so I don't know what I did wrong with the first one.


The print was quite a large design and I was concerned with positioning the pattern evenly over the top. I didn't have a lot of fabric to play with so I spent quite a bit of time playing around with the positioning of the pattern pieces before cutting out.


I am really pleased with how this turned out and I am glad I spent that extra time at the beginning of the project. It would have looked terrible if the same large pattern motifs had been placed side by side.


The hems were all sewn with a very narrow zig zag stitch because I was being lazy and couldn't be bothered setting up the twin needle. They all look fine and have enough stretch to prevent the thread from breaking.


This is actually my second Jungle January item sewn this month. The first is yet to be photographed...hopefully this weekend. It features a zebra print. Have you sewn something up for Jungle January yet?

Happy Sewing