Showing posts with label Skirts. Show all posts

Tuesday, 6 February 2018

A Polka Dot Grainline Studio Moss Skirt

Grainline Studio Moss Skirt
This is my second time making the Grainline Studio Moss Skirt, and it has been a long time in the making. For those of you who follow me on Instagram, you might remember me posting this half made skirt as my "ufo" in "Sewvember 2016" and it had been hanging around my sewing room for a couple of years before that. I was finally prompted to finish it in November 2016 only to discover that it was too small (not that I was too big, of course) and so it was put in the naughty corner again for another 12 months. I came across it again, last November and decided to try it on as I had lost a few kilos. To my delight, it fitted. All I had to do was sew on the hook and bar and it was finished.


As the making of this skirt has been stretched out over such a long period, all the details have escaped me. You can find my blog post on my first version here if you are interested. I do remember that I sized down for this one and cut a size 10.


The fabric is a cotton canvas from Spotlight, bought several years ago. I'm a little disappointed at how much it wrinkled in the photos. These were taken after a few hours of wear.


Despite being a fun little skirt, I have not worn it very much. I don't think it's the most flattering style on my figure, so I don't feel comfortable wearing it. I might feel different if I wore a loose untucked top (but then all the details of the skirt would be hidden). I probably will not make this pattern again, but I am glad to have finally finished this one.


Happy Sewing

Jean

Sunday, 13 August 2017

Sewaholic Hollyburn...a departure from my usual style.

Sewaholic Hollyburn Skirt
The Hollyburn Skirt from Sewaholic Patterns has been around for several years, and it has taken me forever to jump on the bandwagon. I have only purchased the pattern recently and I am kicking myself for putting it off for so long. 


The skirt comes with three length variations and the choice of belt loops or button tabs. All views have pockets too. I chose view A, which finishes below the knee, and I added the button tabs to the waistband. I am wearing it here with my Style Arc Elsie Woven Overshirt.


The fabric is a 100% wool suiting in navy with a subtle stripe. This fabric was a recent gift from my mother and it originally came from my grandmother's fabric stash. I have no idea how old it would be, but she passed away in 1988 at the age of 80 so it would have been purchased a number of years prior to that. It was a large piece approximately 3 metres long and 1.5 metres wide but a big section of it was riddled with moth holes. I had to carefully mark all the moth holes with chalk before laying out the pattern pieces in order to avoid them. There was plenty of undamaged fabric available for the skirt, and there is still a large piece left over for something else.


I cut a size 12 based on my waist measurement as this is the most fitted area of the skirt. My hip measurement put me at size 8, but I decided to make a straight size 12 as I liked the idea of a nice full skirt. I am really happy with the fit of the skirt so I'm glad I didn't try to blend sizes. If your hip measurement is proportionally larger than your waist measurement then you would need to grade between sizes.


I love the roomy pockets and how neat they turned out. The instructions with the pattern are very thorough and easy to understand. In fact I was amazed at how easy this skirt was to construct and how beautifully it went together. This would be an ideal pattern for a beginner sewist. I just love the shape of the skirt and it feels so elegant to wear.


Here is a closer view of the button tab and the pocket. I cut the pocket with the stripes running the opposite way so I didn't have to worry about matching the stripes. The waistband is quite wide and sits high on my waist. I really like this and the way it gives the illusion of me actually having a waist. I did attempt to match the stripes on the centre front and centre back, creating a chevron effect, but this didn't work out perfectly. In fact this pattern is not recommended for striped fabric.  


 I used an invisible zipper in the centre back seam. The instructions recommend a regular zip so I hope this one holds up ok. I'm pretty happy with my zip insertion and getting the waistband lining up on each side. This did take a couple of attempts before I got it right.


I got carried away when constructing my skirt, and forgot to add the lining at the appropriate step. So silly, but it would have meant too much unpicking to go back and add it, so I decided to just hand stitch it in after the skirt was constructed. I'm so glad I added the lining, as it makes the skirt feel so luxurious when wearing it.


Here is a shot of the insides. I used french seams on the lining. The centre front and centre back seams were sewn on the machine, pressed open and raw edges overlocked. The side seams were overlocked together and pressed towards the back. I wanted to retain as much length as possible so I finished the hem off with some satin bias tape from my stash which was hand stitched to remain invisible on the right side.


As you might have guessed, I absolutely love my new skirt, even though it is quite a departure from my usual style. I really enjoyed sewing this wool suiting (quite a change from my usual ponte knits) and I think my Grandmother would have approved. 

Happy Sewing

Jean

Wednesday, 14 September 2016

Paprika Patterns Jade Skirt and another Style Arc Estelle Jacket


Continuing on with my love affair with Style Arc ponte, I have created this ensemble using the Paprika Patterns Jade Skirt and the Style Arc Estelle Ponte Jacket. Fabric is a taupe ponte purchased from Style Arc, which is currently unavailable.


This is the second time I have made the Estelle jacket and I don't really have anything more to add about this pattern, except that I love it and it has been getting a lot of wear. You can read about my first one here.


I still couldn't leave the edges raw. This time I turned a 1cm hem twice and machine stitched close to the edge.


The Jade Skirt is a "curve-hugging skirt that you'll feel comfortable in" according to the website description. The unusual folds on the front are what make this skirt stand out from the usual fitted knit skirt patterns available.


These required precise accuracy at the construction stage, which was not that difficult...just a bit fiddly. The instructions were excellent and there is also a short video on the website, which I found very helpful. I lined the skirt with Vanity Fair Lingerie Tricot purchased from Knitwit. Each fold is sewn to the lining to keep it in place.


The skirt is very figure hugging, and I would only feel comfortable wearing it with a long jacket . I like the shape of the skirt paired with the shape of the jacket. The jacket also works well with pants and in the photo below I am wearing it with Style Arc Elle Pants on our recent holiday to Western Australia. The photo is taken in front of the Busselton Jetty.


Both these garments have been great additions to my wardrobe and have been worn a lot, both together and individually.

Happy Sewing

Tuesday, 19 January 2016

Colette Mabel Skirt & a repeat of the Style Arc Esme Top.


Colette Mabel skirt worn with Style Arc Ann T-Top. The denim jacket is RTW.

I have made the Mabel skirt from Colette Patterns several times before... see here and here, although I have not been completely happy with the fit until now. This is a great pattern for a simple knit skirt, but I have found it does need a little tweaking, depending on the fabric used. The stretch factor of different knits can vary so much.


This fabric was originally bought with the Style Arc Esme Designer Knit Top in mind. It is a gorgeous printed scuba knit that I purchased from Spotlight a while ago. It just screamed casual summer to me...specially when combined with white. I did make the Style Arc Esme Top and I managed to eke out the Mabel skirt from the left overs as well.


I made version 1, without the design seam lines on the front, and lengthened it considerably. I had planned to add the kick pleat at the back, but the amount of fabric I had left did not stretch quite that far. Instead, I created a split in the centre back, for walking ease. This seam was pressed open and then the seam allowances were top stitched down. I find scuba knit to be very springy and hard to get to lie flat, but this worked a treat. I used some left over white cotton lycra from the T Shirt to line the waistband.


Instead of just rushing ahead with this one, I decided to take my time and work on getting the fit more to my liking. I machine basted the side seams several times before I was happy with the shape. From memory, I pegged the skirt in a little from around the hip line down to the hem, to create a little more of a curve. My body is rectangular in shape, so benefits from any added curves. I also added elastic to the waistline, as I find it slips down without it. The hem was hand sewn.

Don't mind the snoozing dog.

Now onto the Style Arc Esme Designer Knit Top that was the original reason I bought this fabric.


 This is the second time I have made this top. The first one was made in a ponte knit which sewed up beautifully. This time I used this printed scuba knit. The scuba knit was not as well behaved as the ponte and I did have to unpick and redo a few bits, so overall it was a bit more fiddly to sew.


I kept the pattern pieces exactly the same as my first Esme, including the length alteration, as I was happy with the fit the first time around.


Again, I have paired it with white. This fabric combination just looks so fresh and summery to me. These denim pants are RTW purchased from Rockmans a few years ago. As my 23 year old daughter was taking these photos for me, she made the comment that "Mother's look good in white pants". I questioned why she thought that and her reply was that "she could never keep white pants clean". I thought that was quite amusing...as if mothers have some super power to keep their white pants clean...I actually find it a struggle.


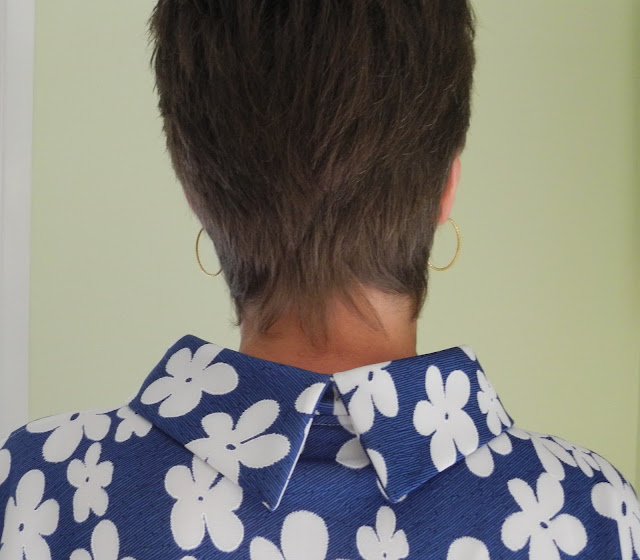
The collar was cut on the bias and sits beautifully in the scuba knit, just as it did in the ponte. Don't try and skimp on fabric to cut this on the straight grain. I don't think it would sit nearly as nicely as it does on the bias.


I had a bit of trouble getting the collar points to look as good as the ones in the ponte, but they are not too bad. I had picked this side to be the one I wanted to show as it looked the best, but I somehow got confused and sewed it on inside out. Glad I persevered and unpicked it, and resewed it on the right way. 


Both these garments were sewn during my Christmas/New Year break from work. In fact, I could have called it a Sewcation. I don't think I will ever wear this top and skirt together though...far too matchy matchy. What do you think?

Happy Sewing

Monday, 28 December 2015

Style Arc Esme Designer Knit Top


The Esme Designer Knit Top appealed to me the minute it was released. The relaxed fit and stylish design lines ticked all the boxes. I have been making the most of the Christmas Holidays by spending time in my sewing room over the last couple of days, much to my daughter's disgust. She just doesn't get the fact that I love to sew.


Style Arc suggest using ponte or scuba knit to make up this top. I have a lovely printed scuba knit ear marked for this pattern, but I decided to use this less precious rich purple delux ponte from Spotlight, to make a test garment.


I made one alteration to the pattern before I started, and that was to add 5cm to the length of the front and back pattern pieces. I added the length in just above the top of the side split. I am long in the body and I knew that I would not find the length flattering on my body, as drafted.


I am happy with the length after my alterations and the fit is ok as drafted. I made a size 12. I love how beautifully the collar sits at the neckline. I was a little dubious about cutting the collar on the bias in a knit, but this has created a lovely result so I am now sold on the idea. The collar only worked folded over. I couldn't make it stand nicely as illustrated on the pattern envelope.


The instructions suggest sewing the seams, pressing them open and then top stitching them down as a feature. I went with this suggestion and am very pleased with the beautiful neat finish this created. All raw edges were overlocked to create a neat edge, before the seams were sewn on the sewing machine.


The front and back hems, side slits, side seams and armhole edges, were top stitched with one continuous line. I did press and pin quite extensively before beginning the top stitching, but I am very pleased with how neat this turned out.


The back collar points turned out beautifully and this was quite easy to achieve. The instructions were clear and also provided diagrams for this step. This ponte was very well behaved and all the corners and points turned out so well. Not something I always have great success with.


The skirt was also made to wear with this top. I used the Colette Mabel Skirt pattern, combining the style of version 1 with the length and kick pleat of version 3. I have made the Mabel skirt twice before and am still working on the fit. This one is made from a scuba knit from Spotlight. I used the purple ponte to line the waistband. I have also inserted elastic into the waistband to make it feel more secure. 


The kick pleat is constructed in the usual way, as opposed to the Colette way of sewing it closed. I think it sits better open. There was enough delux purple ponte left over to make another Colette Mabel skirt, which can also be worn with the top to create a different look.


Now on to the next project...


Happy sewing

Tuesday, 22 September 2015

Colette Mabel Skirt

Colette Mabel
The Colette Mabel skirt is the perfect pattern for a beginner sewist to try. There are three variations to choose from and the instructions are detailed and easy to understand.


This pattern ticked a lot of boxes for me: great wardrobe staple; uses knit fabric; and is quick and easy to sew. I have been admiring lots of Mabel's around the blogsphere for ages, so I don't know why it has taken me so long to give it a try.


This is actually the second Mabel I have made. The first one made a brief appearance during Me Made May.


I made Version 3 with the decorative seaming and kick pleat. My first skirt was made using black ponte purchased from Style Arc. This fabric was a high quality ponte with a nice amount of stretch and excellent recovery, and best of all... no pilling. The fit of this skirt is a little snug around my backside and I will only wear it with a long cardigan.


For my second skirt I used a navy ponte purchased from Spotlight. This is also a high quality ponte but is less elastic than the black ponte from Style Arc. I made a larger size to get the looser fit I was after. It actually turned out too big this time and I had to run the side seams in.


After looking at these photos, I think I should have just made the smaller size, as the fit is a little looser than what I was trying to achieve. I actually had to add some elastic to the waist to make it feel more secure after a few wears. It felt like it might fall down. (The smaller one in the black is fine without the elastic though).


You can see the decorative seaming on the front in the photo above. I top stitched the seam allowance down with a twin needle to highlight the design feature.


The hem was hand stitched for a nicer finish (although it is still quite noticeable in the photo's). I did construct the kick pleat a little differently from the instructions. You are supposed to sew the centre back seam and continue around the pleat, sewing it closed. You then fold it to the side, press and top stitch to hold in place. I had read on several blogs that after sitting in the skirt the pleat refused to hang properly. I sewed the centre back seam stopping at the start of the pleat. I overlocked the raw edges of the pleat sections, folded to one side, and top stitched in place across the top, leaving the pleat open. This has worked out well and as you can see in the photo above, the pleat is hanging just fine and I have been sitting in this skirt all day at work before these photos were taken.

You can expect to see a few more Mabels popping up here in the future. I have already earmarked some fabric in the stash.


Happy Sewing