Showing posts with label McCalls. Show all posts

Sunday, 18 January 2015

White Snake Foile Print Maxi (aka McCalls 6552)

As usual, I made myself a new dress to wear to my work Christmas Party last month. I was a little strapped for time, so I chose a simple pattern McCalls 6552 (unfortunately now OOP), which I have made before here and here


Taken at Circular Quay just before boarding the boat for our dinner cruise on Sydney Harbour (my 2014 work Christmas Party)
This is a versatile little pattern that can be dressed up for a glamorous party or dressed down as a beach cover up, depending on your fabric choice. It can be made in a knit or a woven fabric too. The bodice front and back are cut as one piece (that's right, there are no shoulder seams). I would recommend this pattern to a beginner as it is quite simple to sew and easy to fit.
McCalls 6552 Line Art
I am usually a size 14 to 16 in the big four patterns, but as I was using a knit, I cut a size Small as I had done for my previous versions. The fabric was purchased online from The Remnant Warehouse. A White Snake Foile Print Jersey, (which is still available). I really had no idea what to expect when I ordered this fabric. It was a bit of a surprise when it arrived. The colour is very close to the photo on the website but it didn't feel like I had imagined. The print is an almost plastic feeling layer on the fabric. I was worried that it might feel like wearing a raincoat. Luckily the wrong side of the fabric feels just like a poly jersey. Due to the print layer, this fabric had very little stretch, which made my dress a little snug and I wished I had cut the larger size.


This version ended up a little short compared to my last maxi. I had added 4cm to the length, but I hadn't realised that I hadn't actually added the extra length to my traced pattern piece. Never mind, it made a feature of my pretty new shoes (and I avoided a trip hazard).


I eliminated the drawstring at the waist and replaced it with some 12mm wide elastic inserted in the casing. This made a comfortable and snug fit which did not need constant adjustment and worked very well. I felt that the dress looked a little unfinished so I made a long sash to wrap around and cover the elastic casing. This was a long rectangle, approx 300 cm long by 22cm wide, folded in half longways, right sides together, and stitched along the length and across one end and then turned right side out. I then tucked in the raw edges on the open end and stitched closed. This is long enough to wrap around me twice.


I finished of the neckline with a knit binding turned completely to the inside. As the Foile Print fabric did not have very much stretch, I used some white cotton/lycra left over from my recently made white T shirts. This resulted in a nice snug neckline without any gaping. As this is a very low cut dress, I wore a white rtw petticoat underneath.


I sewed french seams for the bodice side seams as they are visible inside the kimono style sleeves. The overlocker was used for the other seams. I turned up a very small hem and stitched with a twin needle. This would be a great candidate for Jungle January, if I hadn't sewn it in December.

Many thanks to my darling husband for taking these photos for me today, and many thanks to my Mother and her husband for the use of their pretty garden. (Mine is an overgrown mess at the moment, due to all the rain and heat we have been having lately, and me spending all my spare time in my sewing room.)

Woops! I almost overbalanced and fell in the pond.

Happy Sewing

Friday, 6 June 2014

Deep Red Peplum Cardi

You may have seen a peak of my McCall's 6844 Deep Red Peplum Cardigan during Me Made May. I have previously made View B in royal blue, but was a little underwhelmed by this pattern, despite it being pattern of the year for 2013 on Pattern Review.


This time I made view C which has a peplum with a shaped hemline. I used this Deep Red Ponte De Roma purchased from Lincraft.

Front view
I lengthened the hemline by 8cm because I thought the original length would not be flattering on my figure, and I am so glad that I did. I am really pleased with this length.

Side View
You can see in the side view how the hemline dips lower at the back. The peplum gives my rectangular figure some much needed curves.

Back view
As before, I made a straight size Medium with no alterations other than increasing the length of the peplum. I also interfaced the front band which has made it sit much better and I regret skipping this step in my blue version.

I interfaced the front band.
The peplum is really just a circle skirt joined to the bodice. The pattern instructions did include a great tip for hemming the peplum. First stitch 6mm from the lower edge of the garment, using long machine stitches (as you would for gathering). Then turn up 1.5cm hem at lower edge of garment, turning in 6mm on raw edge and tucking under. You can then use a pin to pull the gathering thread to ease in the fullness, and press (pinning as you go).

Here you can see the loop of the gathering thread that has been pulled to ease in the fullness.

This was a very long hemline.
The hem was top stitched using the width of my presser foot as a guide. You will notice that I have moved the needle over to one side to get the desired distance from the edge of the garment for the stitching line, while still being able to use the edge of the presser foot as a guide.

Close up of side

Close up of peplum skirt.

Inside view. Seams were all finished on the overlocker.

Overall I am very happy with this cardigan so McCall's 6844 has redeemed itself. I can now see why so many have raved about this pattern. Just keep in mind that the sleeves are very fitted and will need to be widened if you intend to wear anything with sleeves under it. I would recommend interfacing the front band and securing it in a few places with a few hand stitches so that it sits properly. And I would also recommend lengthening the peplum on version C so that it sits at a more flattering position.


Happy Sewing

Tuesday, 13 May 2014

A Stylish Blue Cardi

I have jumped on the bandwagon and purchased McCall's 6844 which was voted Pattern of the Year for 2013 on Pattern Review. There have been so many favourable reviews of this pattern that I thought I had better see what all the fuss is about.


McCall's 6844 View B


I decided to make view B which is the longer length without the peplum as I thought this would be more work appropriate. I used a royal blue ponte de roma purchased from Lincraft when it was on sale for $10.49 per metre. 


I cut a size medium which has turned out slightly too wide across my shoulders, although I'm not sure I could get away with a small. 


It has nice shaping down the the side seams which is quite flattering, but looking at this photo it make my backside look huge.


The sleeves are very tight which makes it suitable to wear over sleeveless tops or very thin sleeved tops only.


As most reviewers advised, I did not interface the collar. It sits very well around the neck but then it just wants to flop forward. I tried to fix this by hand stitching it down at the hemline. This still makes it hang funny. I think I will hand stitch it down in a couple of more places further up towards the waistline.


Topstitching.
I added the top stitching around the collar as instructed, which anchors down the seam allowance and gives a nice neat finish on the inside. I also sewed the sleeves in flat.


Well...to tell the truth, I have been a little underwhelmed with this pattern. Maybe my expectations were a little high due to all the hype out there in the blogosphere?

But in saying that, I'm sure I will get a lot of wear out of this cardi and I just love the colour. I have already cut out View C so stay tuned for another review coming soon.


Happy Sewing

Wednesday, 1 January 2014

The Christmas Shirt (aka McCalls 6044 take 2)

I made my dear partner another shirt, this one for Christmas. I used McCalls 6044 as previously blogged about in The Birthday Shirt. I used all the previous alterations to the pattern, but in addition to those I also lengthened the sleeves by 6cm.


Sleeves actually fit those long arms this time.
This is a lovely soft 100% cotton shirting purchased from Spotlight. I actually used the wrong side of the fabric as the right side because the blue lines were a little more subtle and just looked better.


Front


Back


Pockets and Pearl Snaps
I cut the pockets on the bias to add some visual interest. This made them a little tricky to sew. I had to be very careful not to stretch the fabric and distort the pocket shape. I'm pretty pleased with how they turned out. 


Back yoke also cut on the bias.

All the seams have been flat felled. I love this technique in a man's shirt. It's really not that hard to do and results in such a lovely neat finish, inside and out.


Tower Placket
As in The Birthday Shirt I replaced the continuous placket with a tower placket, but I lengthened this one to make rolling the sleeves up a little easier. I cut the tower placket on the bias and to avoid distorting the fabric, I fused a very lightweight interfacing to it. This worked beautifully and I was very pleased with the result. It hardly added any stiffness to the placket so it hasn't effected function at all.


Close up of shirt details
Instead of buttons, I used pearl snaps (press studs), a request from my partner. These came from snapsource.com and I applied them with my Snap Setter tool also purchased from the same supplier. I can't recommend this company enough. The snaps are really good quality and the Snapsetter Tool is very easy to use. Tip: don't attempt to apply snaps after 10pm or you may experience some abuse heated discussion from other members of your household. I speak from experience.


He's smiling...I think he likes it.

I have found sewing men's shirts very satisfying. It's fairly easy to achieve a good fit as they have less curves than women and they just turn out so well...just like a bought one, only better.

On a different note, I have joined Sarah from Goodbye Valentino in a Ready To Wear fast for 2014. That means I have given up buying Ready-to-Wear clothing from January 1 2014 – December 31, 2014 one year in favour of making my clothes. 


What constitutes a RTW fast? Refraining from buying ALL outerwear, dresses, tops, pants, shorts, sweaters, coats, exercise clothes, jeans and bathing suits. Shoes, socks and underwear are permitted :)


Happy Sewing

Sunday, 27 October 2013

The Birthday Shirt

Well, I have finally made my partner a proper men's shirt. (I have been promising this for a while now), just in time for his birthday.


In preparation to make this shirt, I purchased Pam Howard's "The Classic Tailored Shirt" from Craftsy. This class was fantastic. Pam is such a great teacher. She explained every step of making a classic tailored shirt very clearly and demonstrated every step in great detail. She even made a couple of mistakes herself, but then explained and showed how to fix those mistakes. I learnt so much from this class and it certainly gave me the confidence to make my own classic tailored shirt.

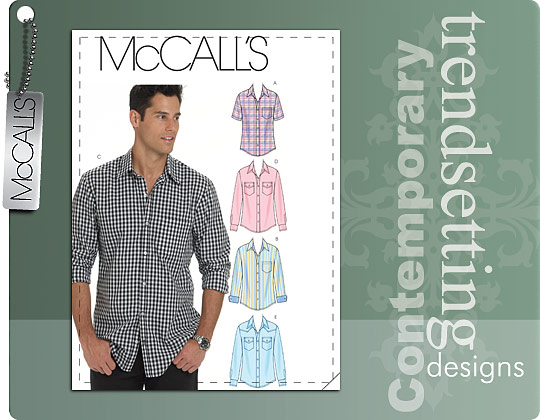
I used McCalls 6044 in a large with a few alterations.


I eliminated the separate front band, by cutting the front band and the shirt front as one piece. I also eliminated the seam in the two piece sleeve, so that the sleeve was only one piece. I redrafted the back of the shirt to create a proper yoke and yoke facing. I made these changes simply to make the shirt pattern more like the Kwik Sew pattern that Pam was using in the class. I also made a tower placket. The Craftsy class did not cover a tower placket, only a continuous placket was demonstrated. However, Pam did provide a pattern for a tower placket in the class notes and a link to her Tower Placket Tutorial.

The fabric I used was 100% cotton shirting purchased online from The Remnant Warehouse and I see it is still available. It was a lovely soft cotton and easy to work with. Although the stripes gave me a headache during the cutting out process. It took a lot of time and thought to get the stripes placed to look their best on the pattern pieces. I was quite pleased with the result. In fact, I matched the stripes so well on the pocket that it is almost invisible.


Pocket


Here are some photos during construction:


Pam's Yoke Trick (aka Burrito method)
After joining shirt fronts to shirt back outer yoke at the shoulder seams, the shirt fronts and shirt back are rolled up exposing the yoke facing, which is then wrapped around the rolls (like a burrito) and pinned to the shoulder seams. After sewing these seams, the rolls are gently pulled through the neck opening revealing a lovely neat fully enclosed yoke.
Yoke facing offset slightly to avoid pulling before stitching shoulder seams.
Setting the sleeve in flat with the "Flat Felled" seam pinned and ready to sew.
Collar and Collar Band ready to attach to neckline. 
Inside: Intersection of  Flat Felled side seams and armhole seam.
Inside of shirt tail hem.
Tower placket and cuff.

I really enjoyed the construction of this shirt. Everything was finished off so neatly. As Pam Howard said "You could wear this shirt inside out if you wanted to". There was some hand stitching involved. The collar band and the cuff facings were hand stitched using a fell stitch, and the buttons were sewed on by hand. This was a nice touch and as Pam Howard said " it makes it a handmade shirt. You can sew a shirt entirely by machine, but you can go to the shops and buy one of those." I have to agree that the little bit of hand sewing made the construction of the shirt more personal and I felt that I was putting a lot of love into it.


Front


Back
Collar
Back yoke and collar
Cuff and sleeve pleats
Overall I am really pleased with how this shirt turned out. My partner even wore it out in public when we went out for dinner to celebrate his birthday. There are a couple of changes I will make for the next one ( and yes, there will be a next one or two or maybe even three). I will add about 6cm to the sleeve length and also increase the length of the tower placket. My partner is very tall (6' 4") and slim and he has extra long arms.

And to finish off....how appropriate was this birthday card?


Happy Sewing