Showing posts with label Craftsy. Show all posts

Tuesday, 14 January 2014

Sewing Christmas Gifts - Given and Received

I only managed to do a little Christmas Sewing this season: a couple of dresses for my gorgeous Granddaughters.


I used the Madeline Dress pattern by Wink Designs, previously blogged about here. The fabric was purchased online from Spotlight. It comes from the 'Lisette' USA Cotton Collection. I was very disappointed when the fabric arrived as the floral fabric was an almost sheer cotton lawn and the contrast green fabric was more like a quilting cotton. Spotlight failed to clarify this in their catalogue where the fabrics were described as if they were all the same 100% cotton. To overcome this, I lined the bodice and the skirt with white polycotton which brought out the colours much better. So despite the fabric issues, I was quite pleased with how the dresses turned out.

Bodice details
I bought the cute little flower shaped buttons on another trip to Spotlight. I cut the blue dress at size 3 bodice with the skirt length at size 4, and the pink dress was size 1 with size 2 length for the skirt. 

The girls wore their new dresses on an outing to the animal farm last weekend, and my son took lots of photos. Here is a collage of them all.

Such little cuties.
I was also spoilt at Christmas with lots of new sewing related gifts. I had dropped lots of hints and this is what I got:


More Fabric Savvy by Sandra Betzina which has loads of info about all sorts of different fabrics and will be a very useful resource; A sleeve Board and a Point Presser and Tailor's Clapper which came from Judis Studio here in Australia; 110 Creations A Sewists Notebook which will be a great help in planning my sewing projects. A $50 Gift Voucher for Style Arc Patterns which came with the free pattern for December - the Lu Lu Tunic; Three Craftsy Classes - Sew Better Sew Faster Garment Industry Secrets40 Techniques Every Sewer Should Know, and Underneath It All. Lots of learning to do here; and some professional quality dressmaking scissors KAI 7250. The scissors are really high quality and are very luxurious to use. These have been hidden deep in my sewing desk, away from the reaches of other household members. I have scattered several decoys around...all useless for cutting fabric.

Thanks to my wonderful family, I have lots of new sewing resources and equipment that will be sure to improve my sewing skills. Looking forward to a great sewing year ahead.

Happy Sewing

Sunday, 27 October 2013

The Birthday Shirt

Well, I have finally made my partner a proper men's shirt. (I have been promising this for a while now), just in time for his birthday.


In preparation to make this shirt, I purchased Pam Howard's "The Classic Tailored Shirt" from Craftsy. This class was fantastic. Pam is such a great teacher. She explained every step of making a classic tailored shirt very clearly and demonstrated every step in great detail. She even made a couple of mistakes herself, but then explained and showed how to fix those mistakes. I learnt so much from this class and it certainly gave me the confidence to make my own classic tailored shirt.

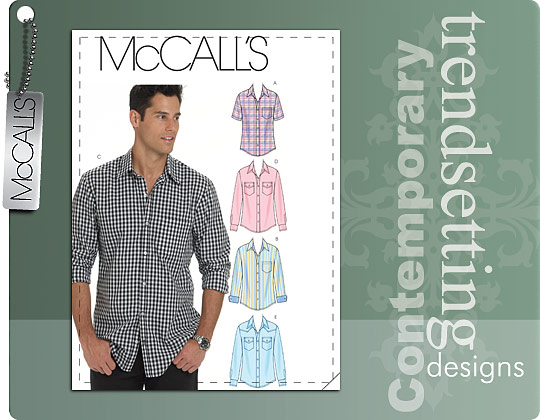
I used McCalls 6044 in a large with a few alterations.


I eliminated the separate front band, by cutting the front band and the shirt front as one piece. I also eliminated the seam in the two piece sleeve, so that the sleeve was only one piece. I redrafted the back of the shirt to create a proper yoke and yoke facing. I made these changes simply to make the shirt pattern more like the Kwik Sew pattern that Pam was using in the class. I also made a tower placket. The Craftsy class did not cover a tower placket, only a continuous placket was demonstrated. However, Pam did provide a pattern for a tower placket in the class notes and a link to her Tower Placket Tutorial.

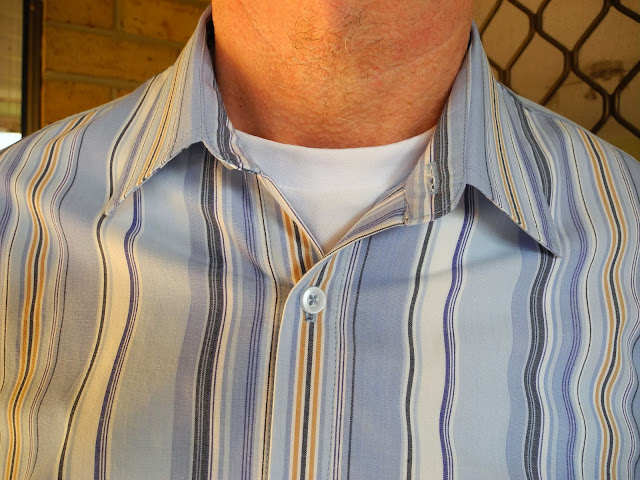
The fabric I used was 100% cotton shirting purchased online from The Remnant Warehouse and I see it is still available. It was a lovely soft cotton and easy to work with. Although the stripes gave me a headache during the cutting out process. It took a lot of time and thought to get the stripes placed to look their best on the pattern pieces. I was quite pleased with the result. In fact, I matched the stripes so well on the pocket that it is almost invisible.


Pocket


Here are some photos during construction:


Pam's Yoke Trick (aka Burrito method)
After joining shirt fronts to shirt back outer yoke at the shoulder seams, the shirt fronts and shirt back are rolled up exposing the yoke facing, which is then wrapped around the rolls (like a burrito) and pinned to the shoulder seams. After sewing these seams, the rolls are gently pulled through the neck opening revealing a lovely neat fully enclosed yoke.
Yoke facing offset slightly to avoid pulling before stitching shoulder seams.
Setting the sleeve in flat with the "Flat Felled" seam pinned and ready to sew.
Collar and Collar Band ready to attach to neckline. 
Inside: Intersection of  Flat Felled side seams and armhole seam.
Inside of shirt tail hem.
Tower placket and cuff.

I really enjoyed the construction of this shirt. Everything was finished off so neatly. As Pam Howard said "You could wear this shirt inside out if you wanted to". There was some hand stitching involved. The collar band and the cuff facings were hand stitched using a fell stitch, and the buttons were sewed on by hand. This was a nice touch and as Pam Howard said " it makes it a handmade shirt. You can sew a shirt entirely by machine, but you can go to the shops and buy one of those." I have to agree that the little bit of hand sewing made the construction of the shirt more personal and I felt that I was putting a lot of love into it.


Front


Back
Collar
Back yoke and collar
Cuff and sleeve pleats
Overall I am really pleased with how this shirt turned out. My partner even wore it out in public when we went out for dinner to celebrate his birthday. There are a couple of changes I will make for the next one ( and yes, there will be a next one or two or maybe even three). I will add about 6cm to the sleeve length and also increase the length of the tower placket. My partner is very tall (6' 4") and slim and he has extra long arms.

And to finish off....how appropriate was this birthday card?


Happy Sewing 

Monday, 9 September 2013

The Perfect Fit (the finished result)

It has been a long road and a steep learning curve, but I have finally finished the outfit previously blogged about here. I had challenged myself to make an outfit, combining elements from three different patterns and putting into practice the fitting skills I had learnt from the Craftsy class Sew The Perfect Fit with Lynda Maynard. The outfit was to wear to my nephew's wedding so I was under pressure to have it completed by September 7th. I finished with a couple of days to spare.

Here are some photos taken at the hotel where we stayed just before leaving for the wedding.


Front view

Back View (this makes me look very bow legged)
I used the bodice from New Look 6130, the sleeves from Vogue 8766 and the skirt was BHL Charlotte Skirt. The fabric I used was Purple Rose Brocade purchased from Spotlight and I used a black anti static Italian Lining also purchased from Spotlight. The brocade frayed madly the minute it was cut, so I overlocked the raw edges as soon as possible. This seemed to keep the fraying under control. 

Peplum detail
I loved how the peplum turned out. Because the brocade was quite stiff, it gave the peplum plenty of body. I ironed the pleats right down to the edge to get them to sit properly. It was difficult to iron a straight crease in the areas cut on the bias, so they are not perfect.

Neckline and bodice.
I was very pleased with how nicely the neckline sat with no gaping. It really is well worth the effort of making a muslin and getting the fit right.

Darts at the sleevehead
Here is a close up of the darts at the sleevehead. I love how neatly they shaped the sleeve and it was very easy to ease into the armscye.

Invisible zip
I was very pleased with my invisible zip insertion. It worked perfectly, first go and even matched the waist seam perfectly. I used the tutorial from The Coletterie

To hem the peplum there was one corner that needed to be mitred. I had to practice a lot on some scraps because it was not a perfect right angle and I new that the brocade would not be very forgiving if I stuffed up and had to unpick. To my amazement, it turned out really neat.

Mitred corner right side.

Mitred corner wrong side
Here are some detailed shots of the inside and lining.


Back
Front. I used purchased satin bias binding to cover the overlocked edge of the facing.
Inside sleeve hem. Satin bias binding used as hem tape.
Back. I bound the end of the zip because it was loo long and I had to shorten it.
The lining was sewed by machine to the neckline and the zip, and then hand sewn at the sleeves and the waist.

I had to make quite a few fitting changes to the Charlotte Skirt. I removed 2.5cm from the top of the skirt, which shortened the darts and I reshaped the side seams to match my curves (or lack of). I removed another 7cm from the bottom of the skirt before hemming. This skirt pattern is very long. I also added a slit at the back seam. Without this, it was impossible to walk in this skirt. I was surprised this was not included in the pattern or instructions.

Back slit to enable walking.
Inside back slit.
This inside shot reveals my big mistake. This is why you should not sew late at night when you are too tired to be thinking straight. I cut the lining too short. I had cut off 7cm from the brocade at the hemline, so I proceeded to cut an extra 2 cm off the lining, so that it would be 2cm shorter than the skirt. (But I forgot that I added the satin bias tape to finish off the hem). Too bad...I was not going to start again.

I attached the lining to the slit by machine so that it would not show. This is a technique I clearly need to improve on.

Lining hem
I used a decorative machine stitch to sew the lining hem.

I have learned a lot during the planning and construction of this outfit, and improved some of my sewing skills. I am convinced that it is definitely worth the effort of making a muslin to get the fit right before cutting into the good fabric.


A couple of shots from the wedding

 A big thank you to my Mum for all her help during the fitting process. I couldn't have done it without her.
Me with my two sisters. Didn't the colours of our outfits look pretty together?

Now onto the next project...


Happy Sewing

Sunday, 25 August 2013

The Perfect Fit ( a work in progress)

My nephew is tying the knot in September and I have been told it will be a formal affair. I have been thinking and planning my outfit over the last month or so. Recently I took a class on Craftsy Sew The Perfect Fit with Lynda Maynard. I thought this might be the perfect opportunity to try out my newly gained skills or see if I actually learned anything at all. I really can't recommend this class enough. Lynda Maynard has a wonderful teaching style. She is organised and methodical in her teaching method, which makes the class very easy to follow. She clearly demonstrates different fitting woes and the way to correct them, on real life models (and they are not all Barbie doll shapes). She then, very methodically demonstrates how to transfer these changes to the paper pattern. It's almost magical.  The pattern used for this class is Vogue 8766.
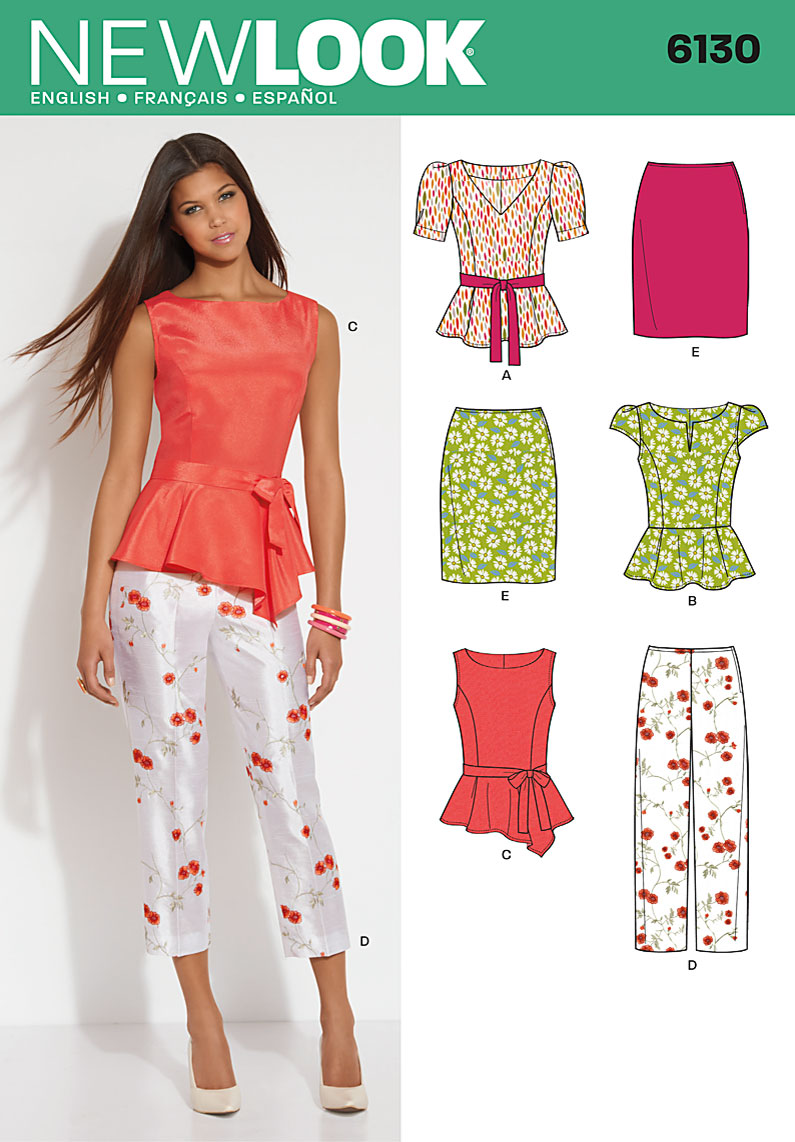
I had a few patterns that I liked certain bits of. So I thought I would combine three different patterns to create my outfit. These are:


I love the princess seams and the shaped peplum of View C and the neckline of View A.
VOGUE 8766: I love the 3/4 sleeves. They have 3 small darts at the sleeve cap to shape them.

BHL Charlotte Skirt: I love the highwaisted skirt and the shaping and length.
I started off making a calico muslin of the bodice. The only drawback is that you really need someone to help you with identifying your fitting issues, once you have made up the muslin. My dear partner struggles to pin two pieces of fabric together without the pins falling out two seconds later, so I had to rope my Mum in to help. She really struggled with the idea of slashing the muslin and adding in strips of fabric to correct the fit. It took me quite a lot of convincing that it was only a muslin (never intended to ever be worn), and it was ok to cut holes in it. She was very worried that she would ruin it.

My slashed muslin with strips of fabric added.

There was quite a bit of slashing to do, to get this pattern to fit my body. I am quite rectangular, not much waist definition. I am really hoping that the peplum is going to give the illusion of a waist.


Here are the changes added to the paper pattern.

Using my altered pattern I created a second muslin of the bodice to double check that my alterations were correct. I included the sleeve this time. I had to add more circumference to the sleeve head, tapering to the sleeve hem, to fit the bodice armscye. This worked out surprisingly well.
Notice the small darts in the sleeve head.

I decided that I wanted to use a brocade fabric to construct my outfit. I had either a royal blue or an emerald green colour in mind. I should have learned by now, that the fabric shop will never have what I have in mind. It would eliminate the inevitable disappointment. Anyway, after a two hour trip to the nearest Spotlight (on route to return my daughter to the airport), I emerged from the shop with this Purple Rose Brocade.
Purple Rose Brocade purchased from Spotlight ( the colour is deeper in reality...hard to photograph)
I suspect this is 100% polyester. It is quite stiff and frays like crazy when cut. I paid $19.99 per metre which I thought was quite expensive, but I had little choice. I guess I am starting to warm to it.

Stay tuned for the next progress report.


Happy Sewing.